THE BEGINNER KIT
Make it

Everything you need to start crocheting, in a kit that will actually look good on your coffee table.
What’s included:
Two small cakes of yarn in different colors
Size I (5.5mm) crochet hook
Yarn needle
Stitch markers
Plastic case for tools
Faux leather travel bag
Keep scrolling for a beginner-friendly written pattern that teaches a few foundational crochet skills to get you started.
Don’t have a kit yet?
What’s special about this pattern?
The Small Granny Square Drawstring Bag pattern is perfect for your first crochet project because
A small bag to keep all your stitch markers and needles organized is practical.
Granny squares are small and quick.
This pattern introduces several common stitches (slip stitch, chain, single crochet, double crochet).
I wrote this pattern taking extra care to explain the individual steps needed to make each stitch type, keeping beginners in mind.
There are video tutorials for each stitch and a guide for how to hold your yarn and hook on my “How to Crochet” page under Fundamentals.
Getting Started with the Pattern
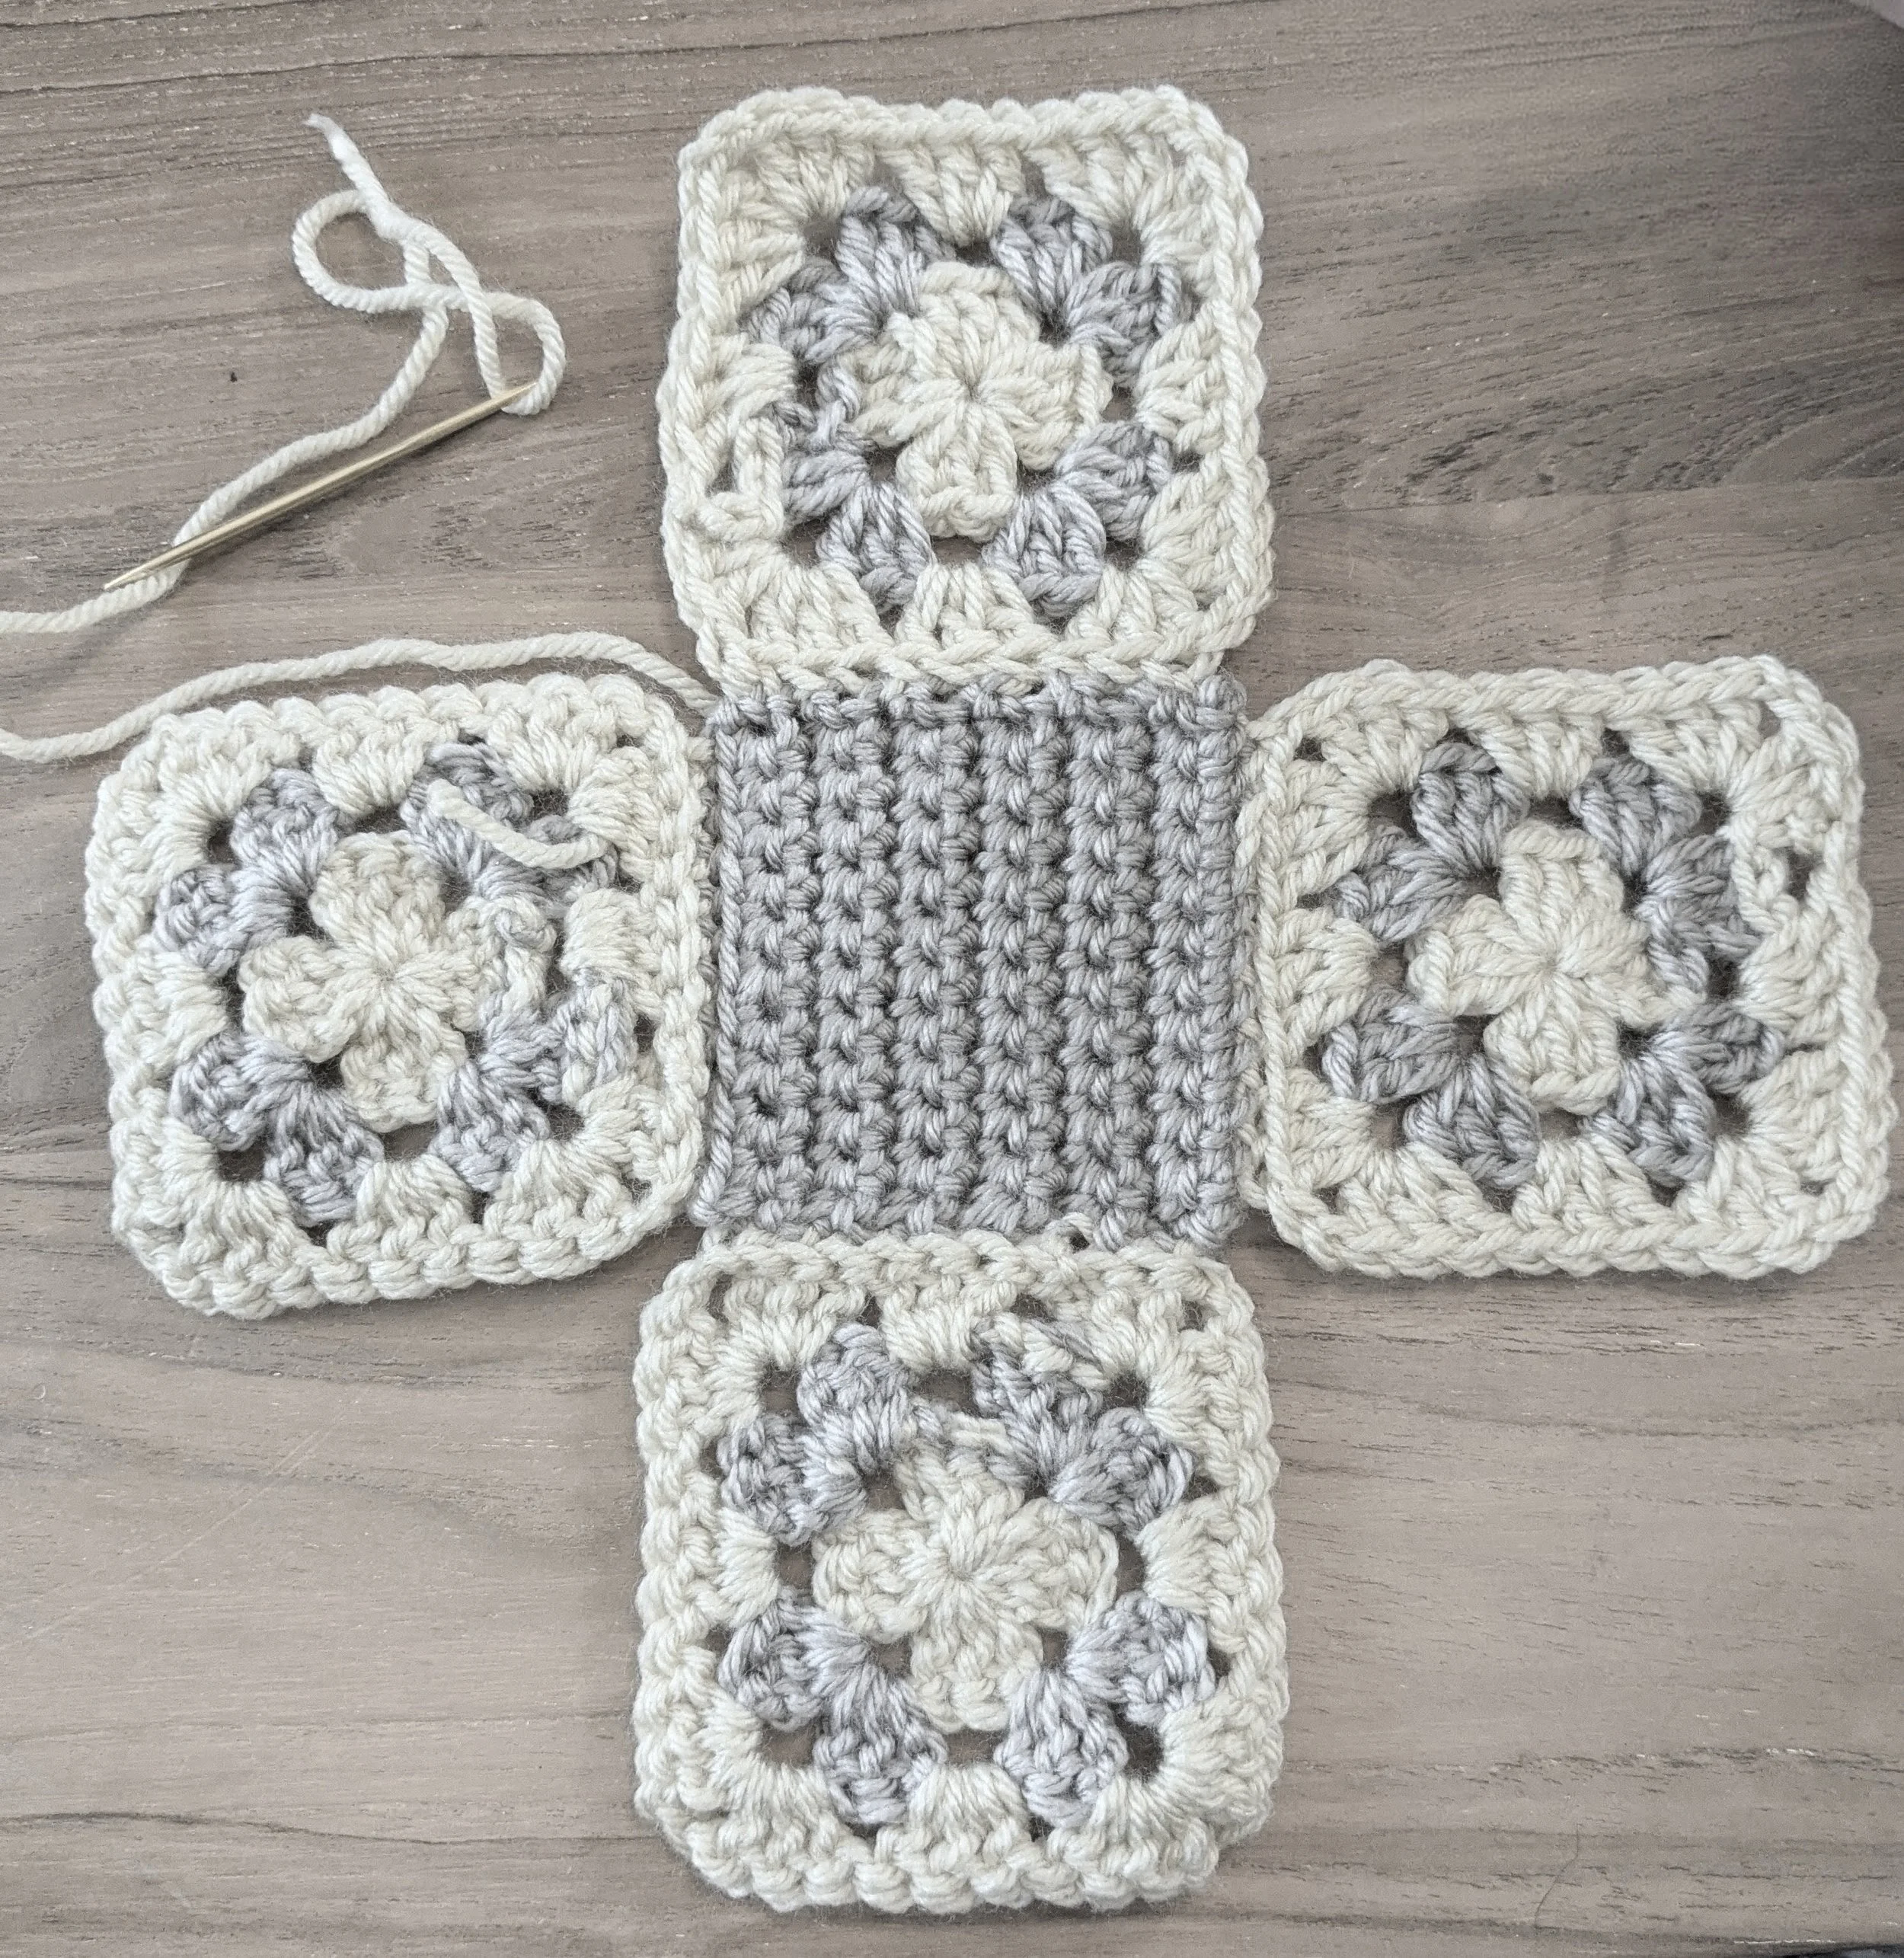
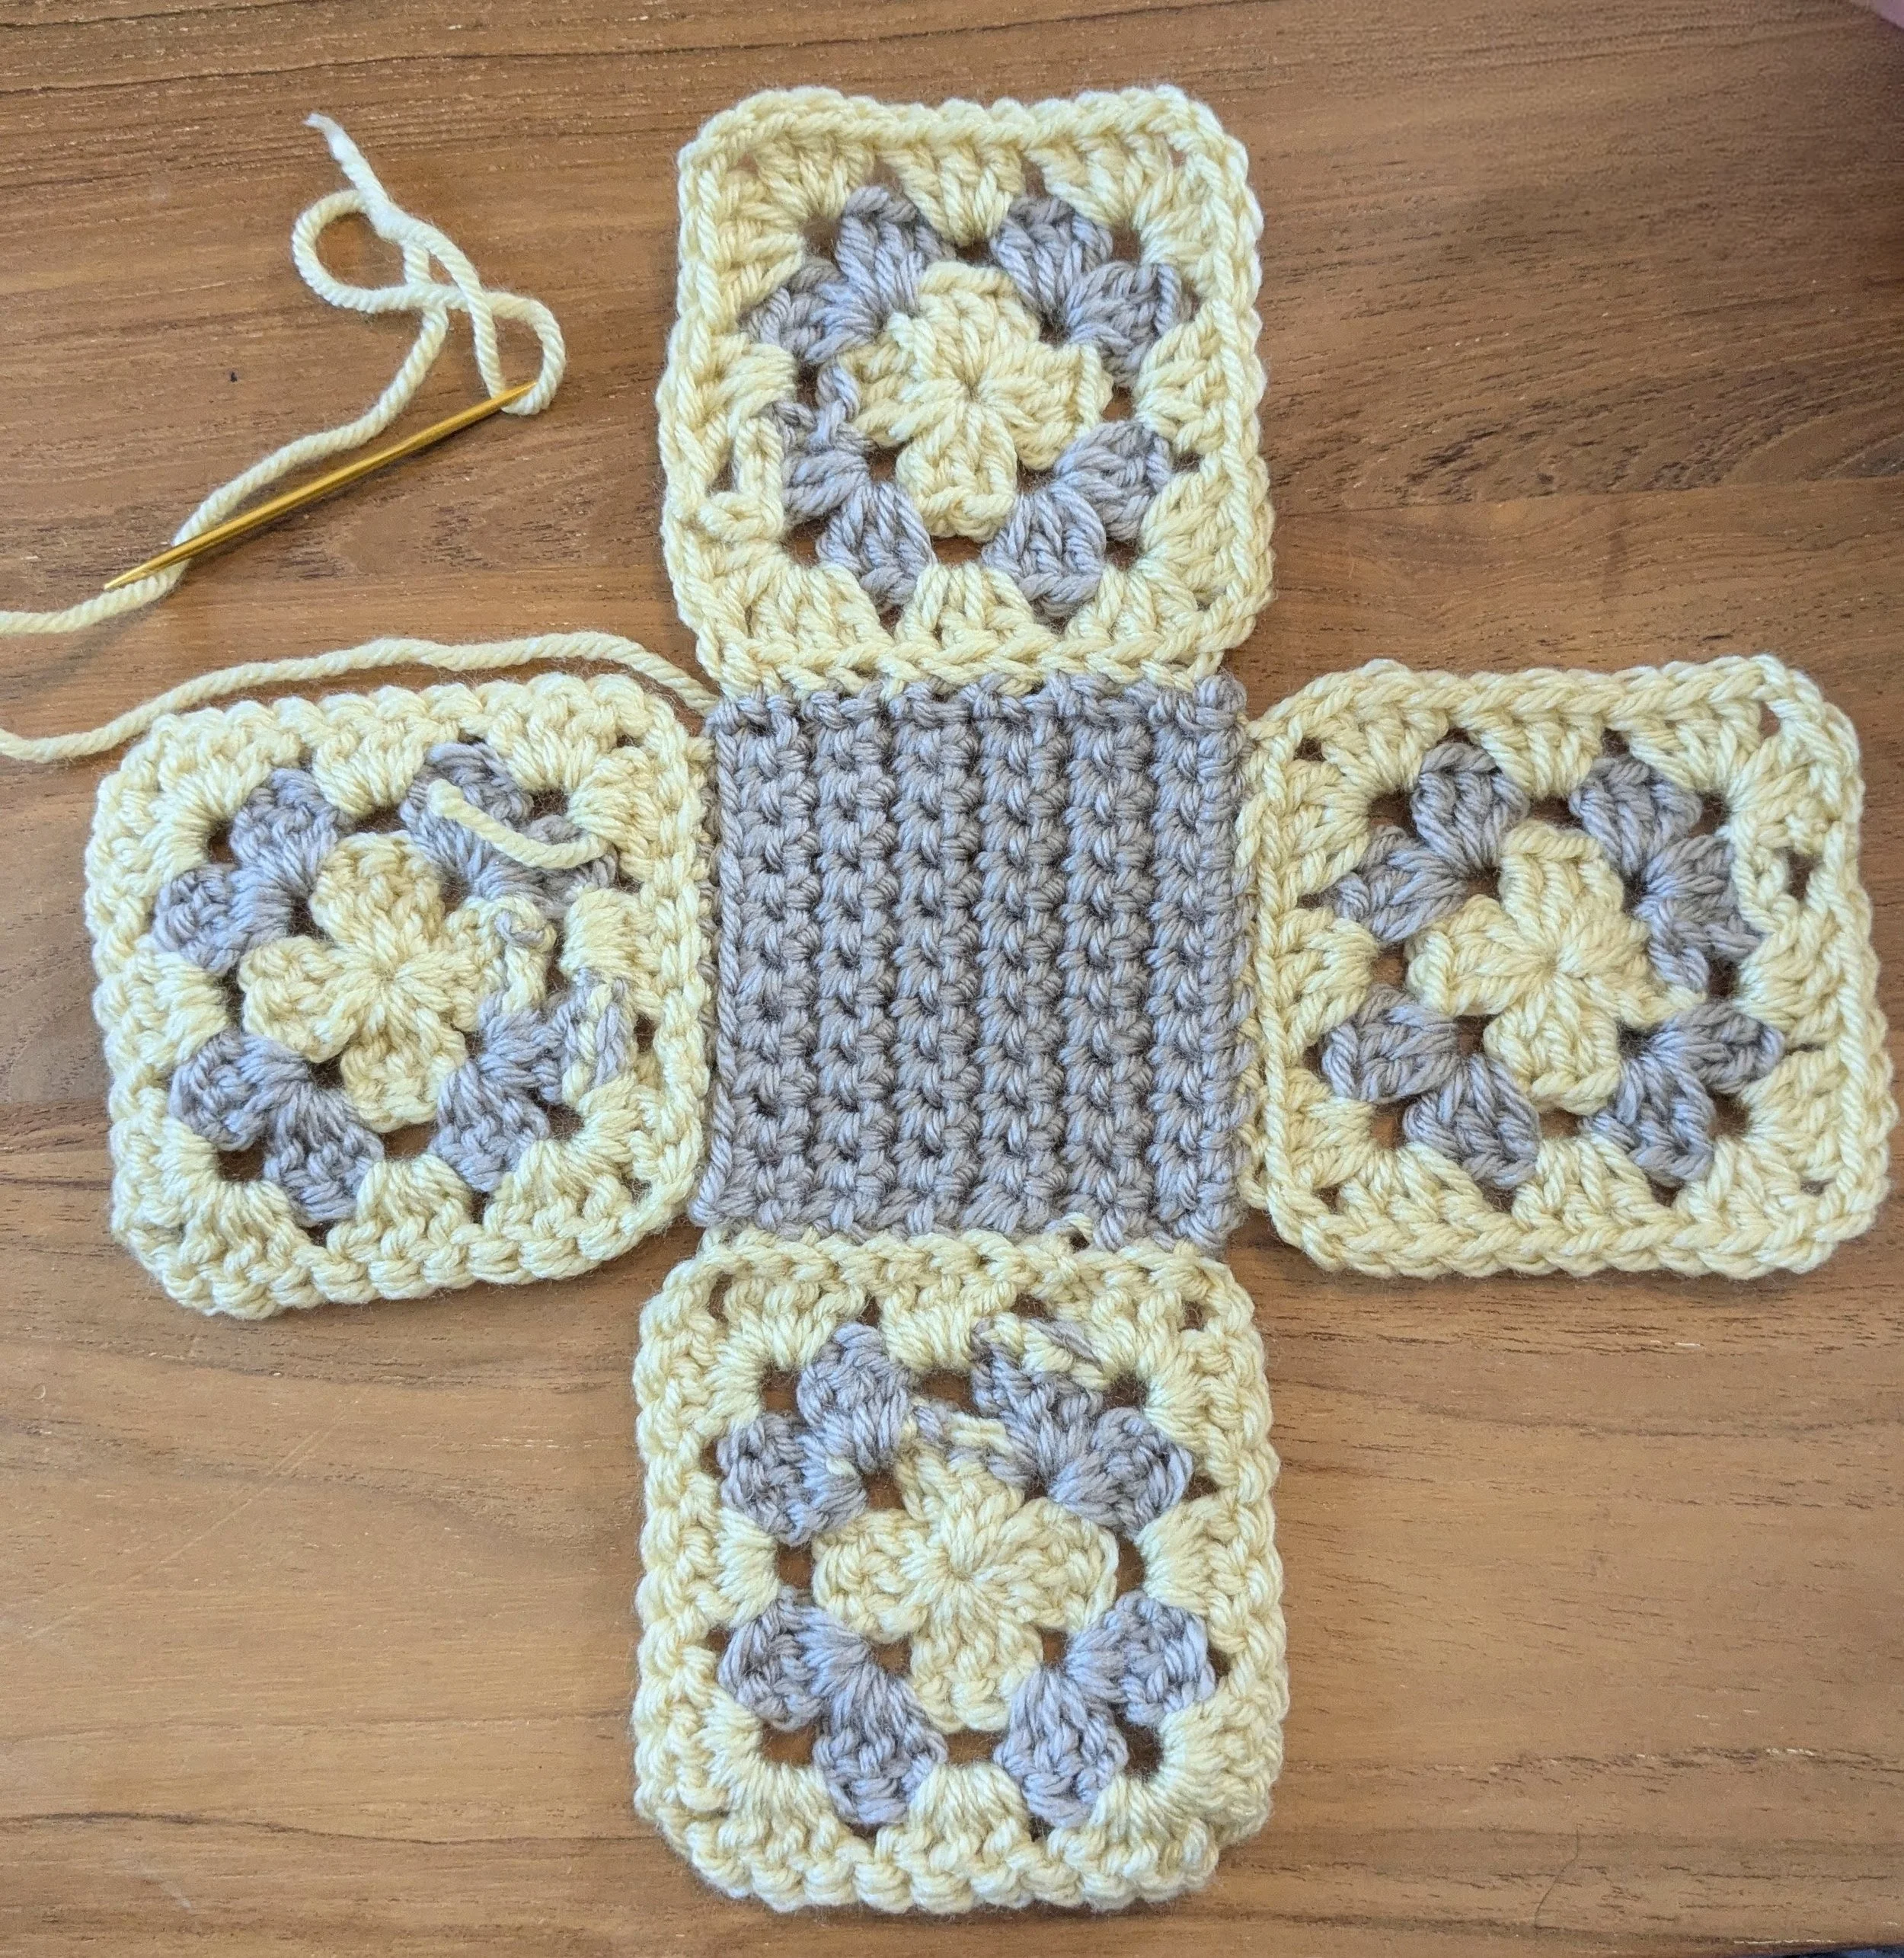
You’ll learn how to make 6 separate pieces:
1 chain for the drawstring
1 flat square for the bottom
4 granny squares for the sides
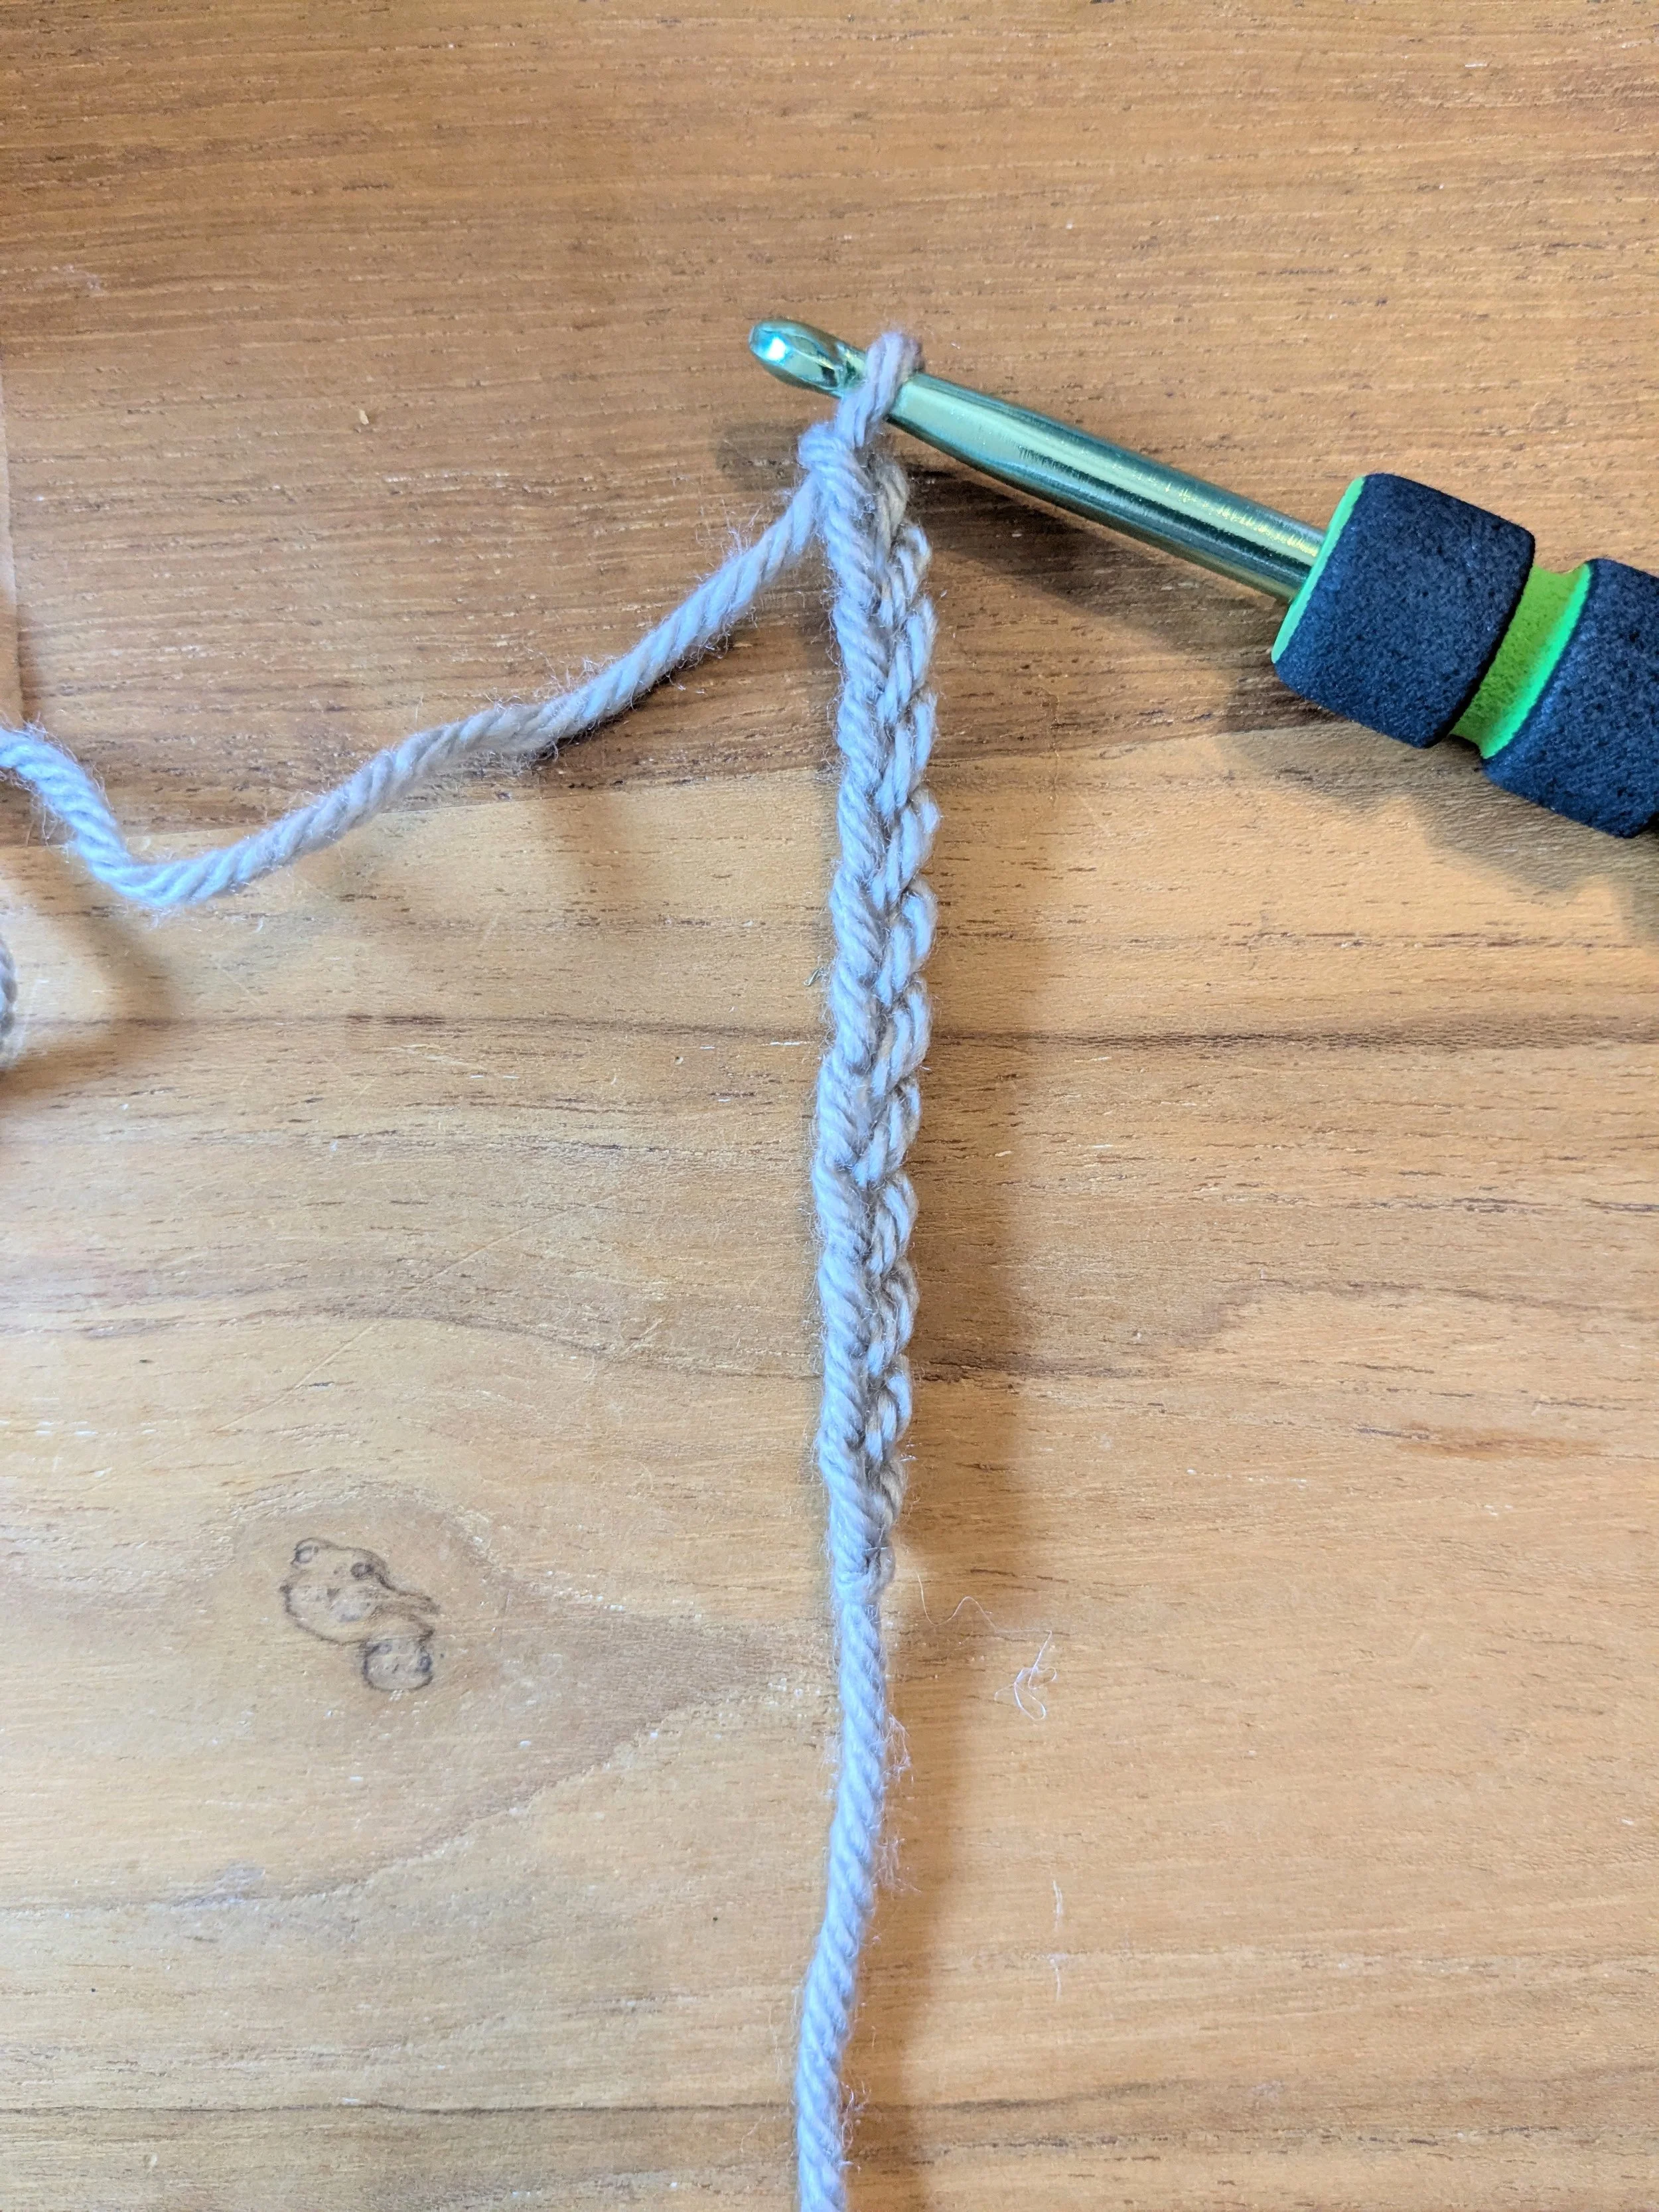
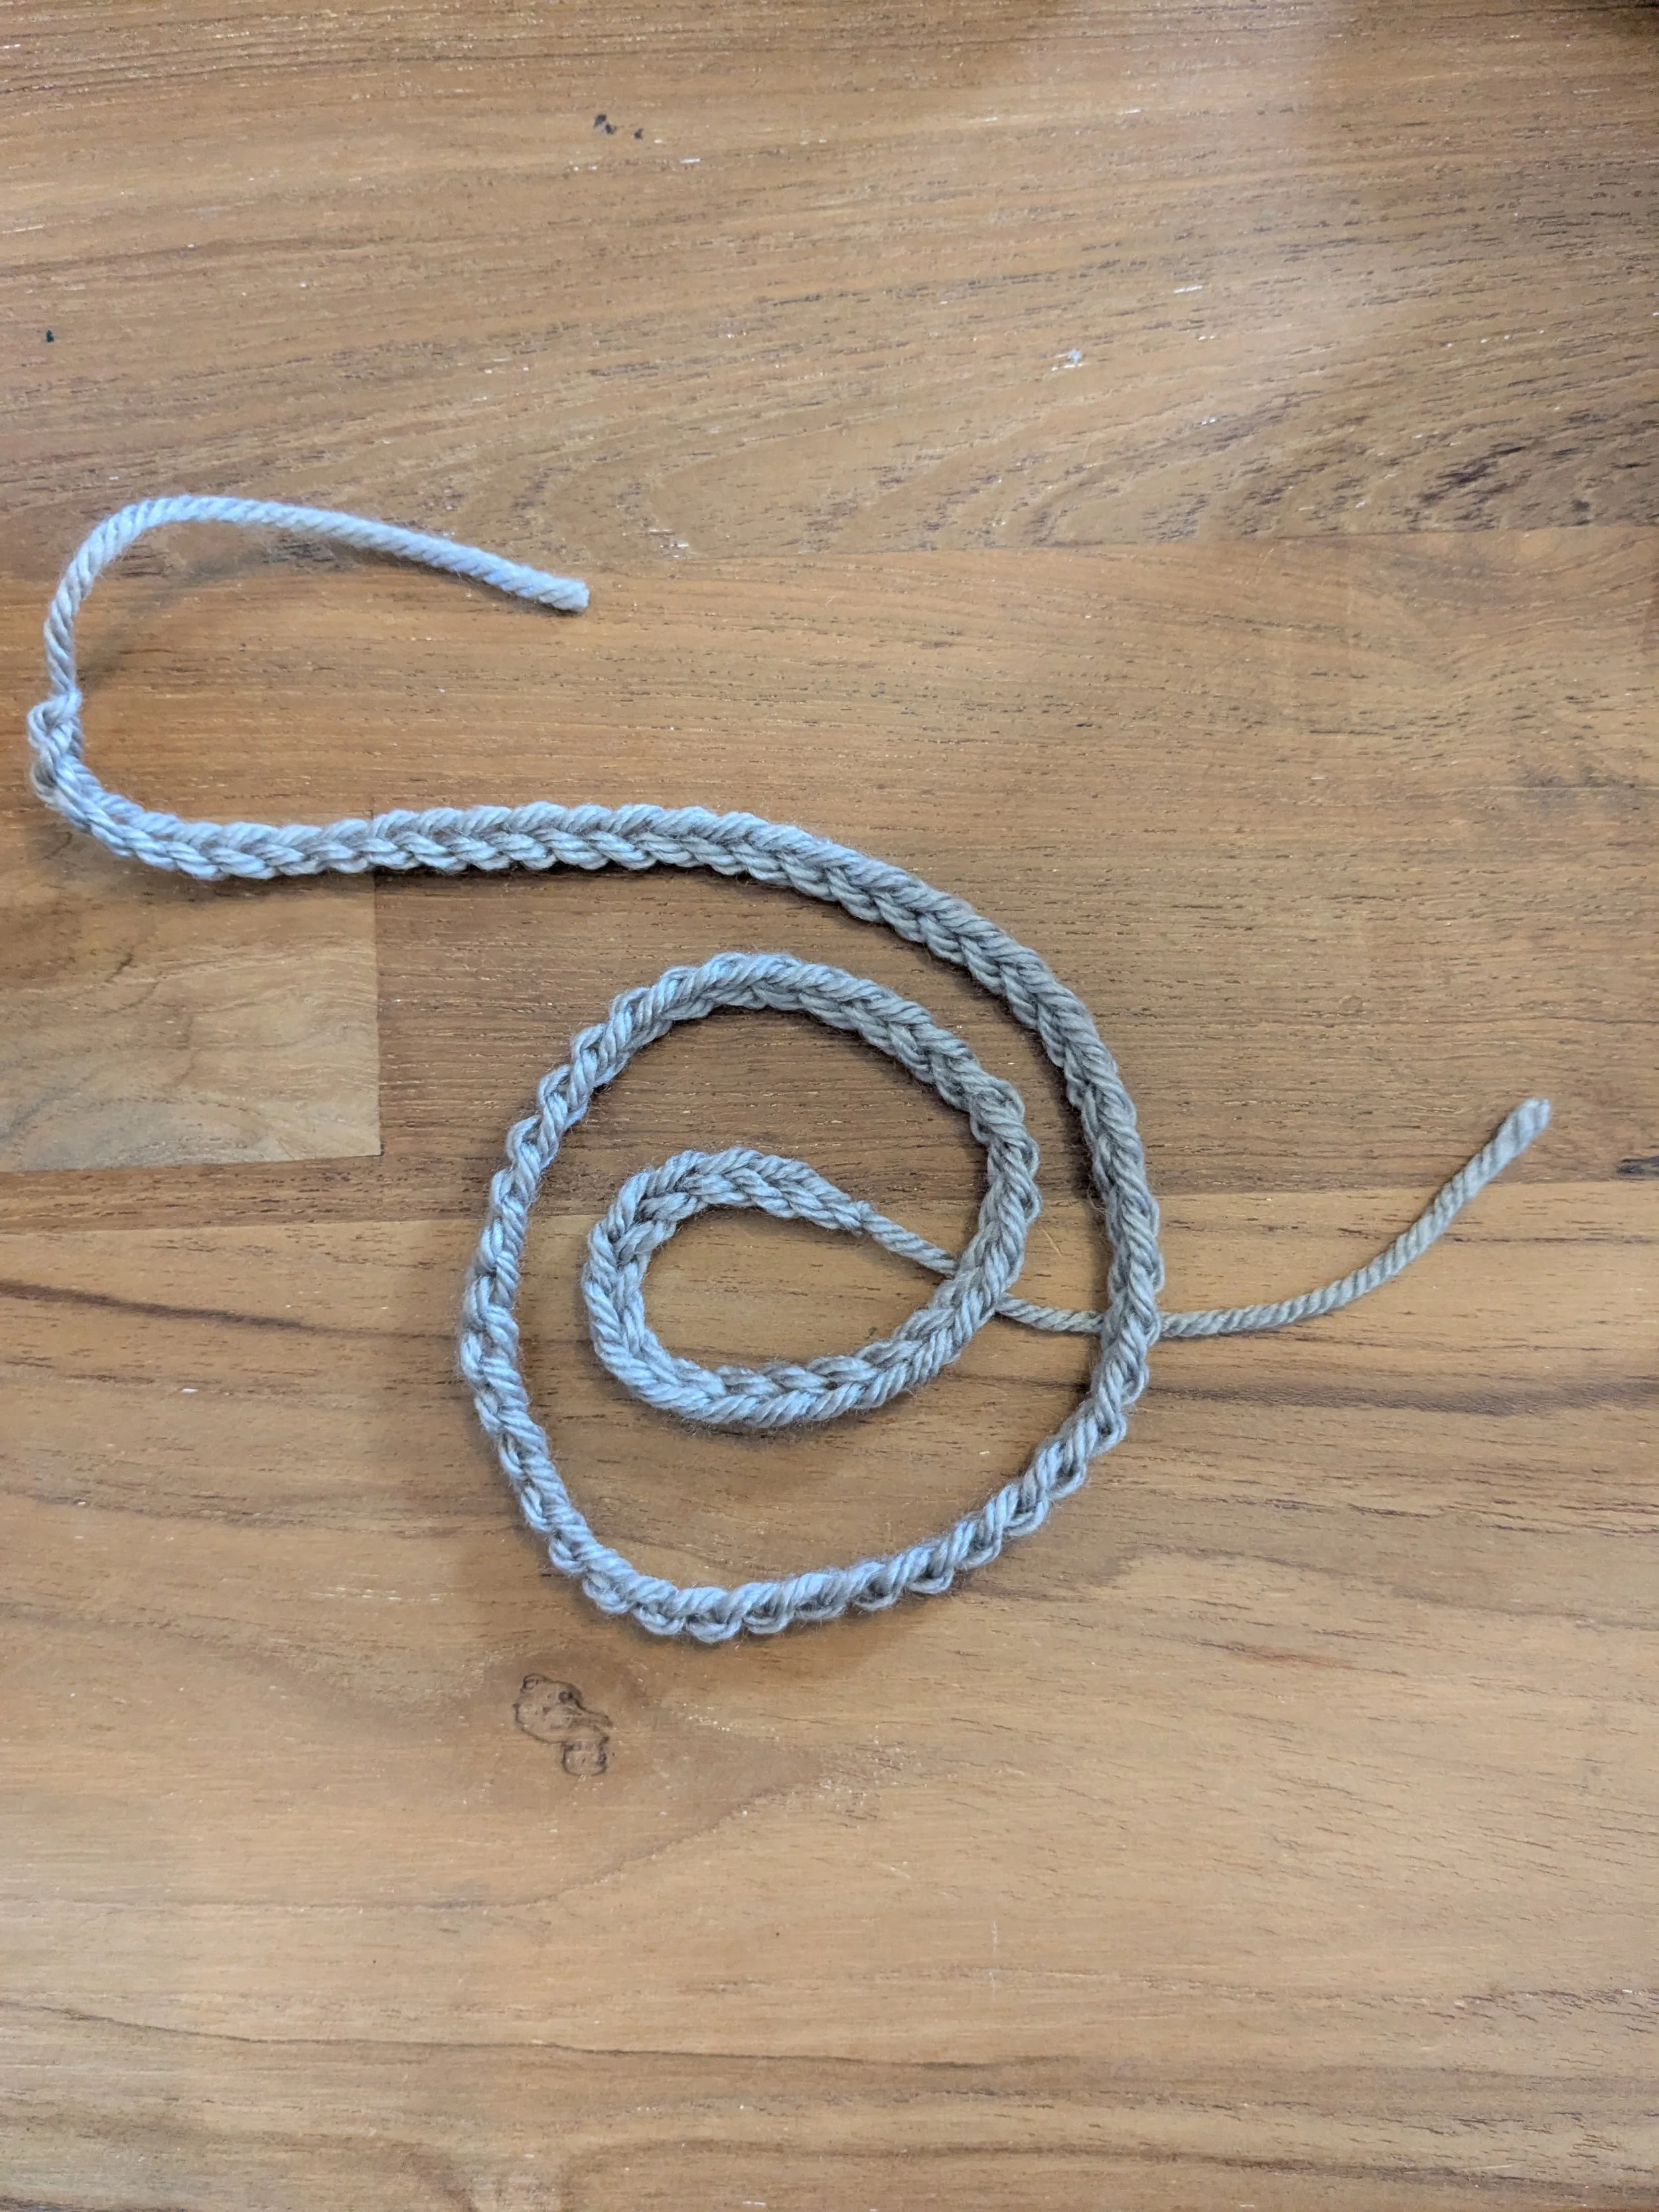
How to make a Foundation Chain (Ch)
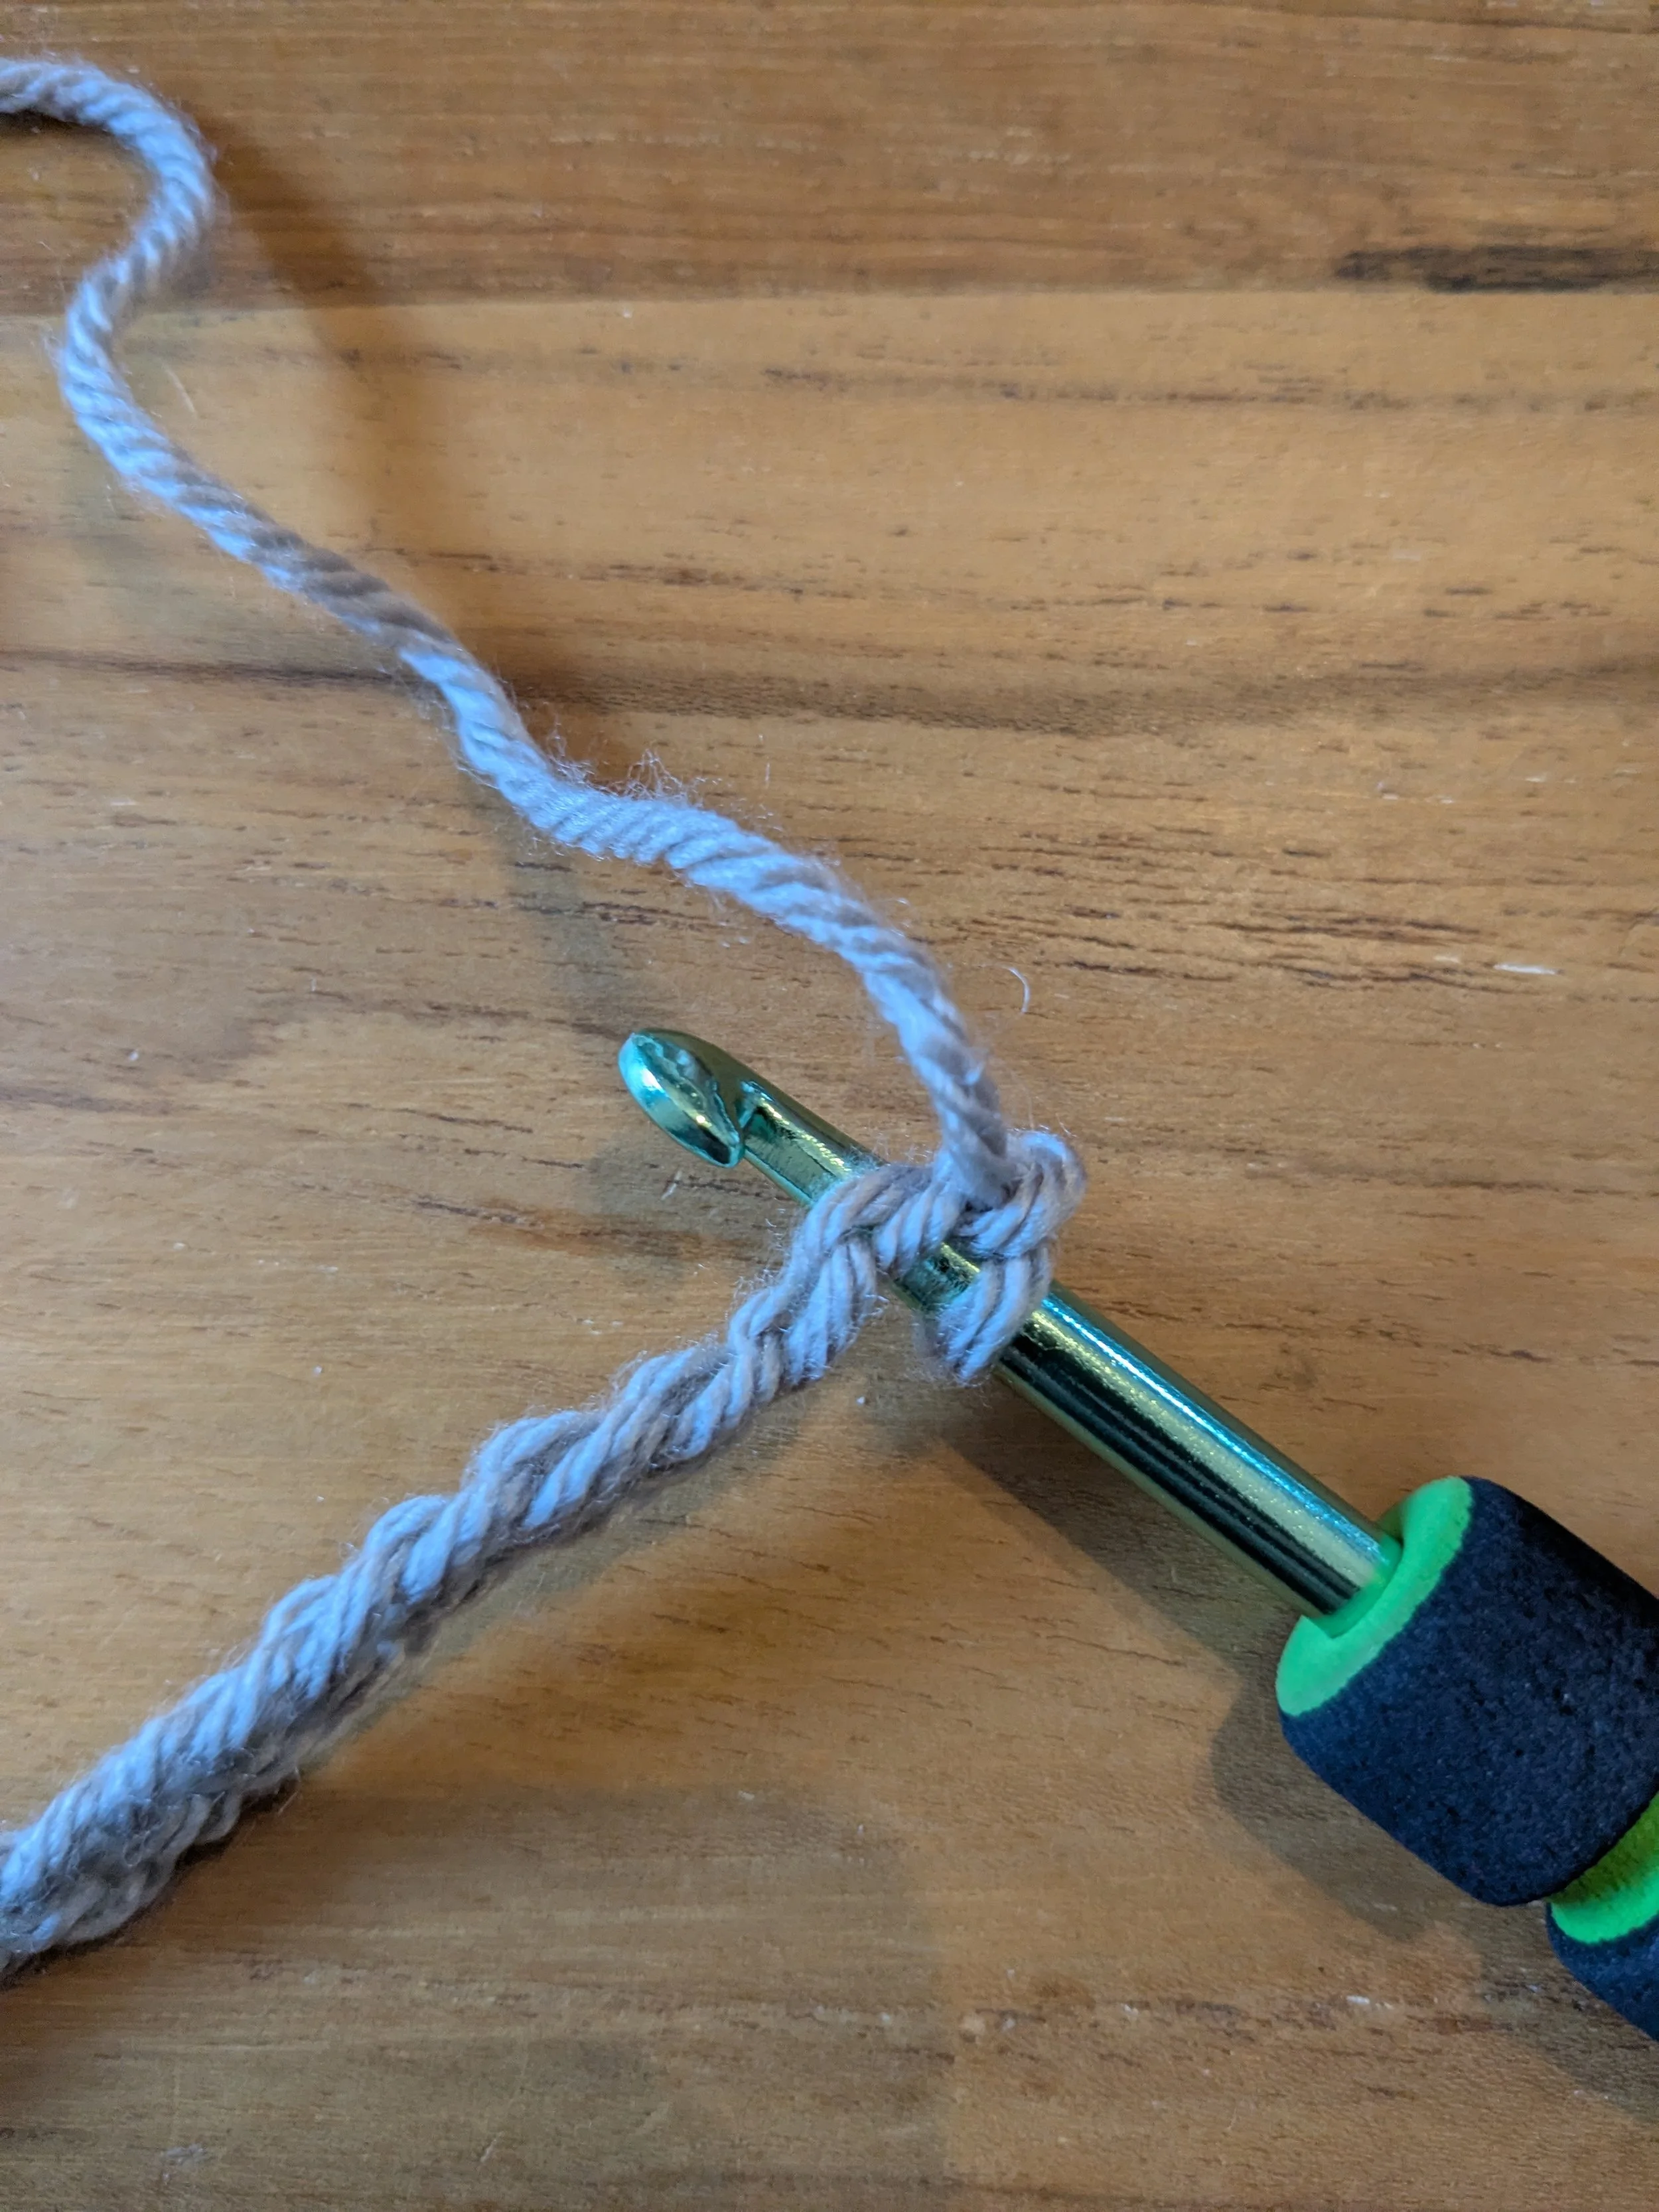
First make a slip knot.
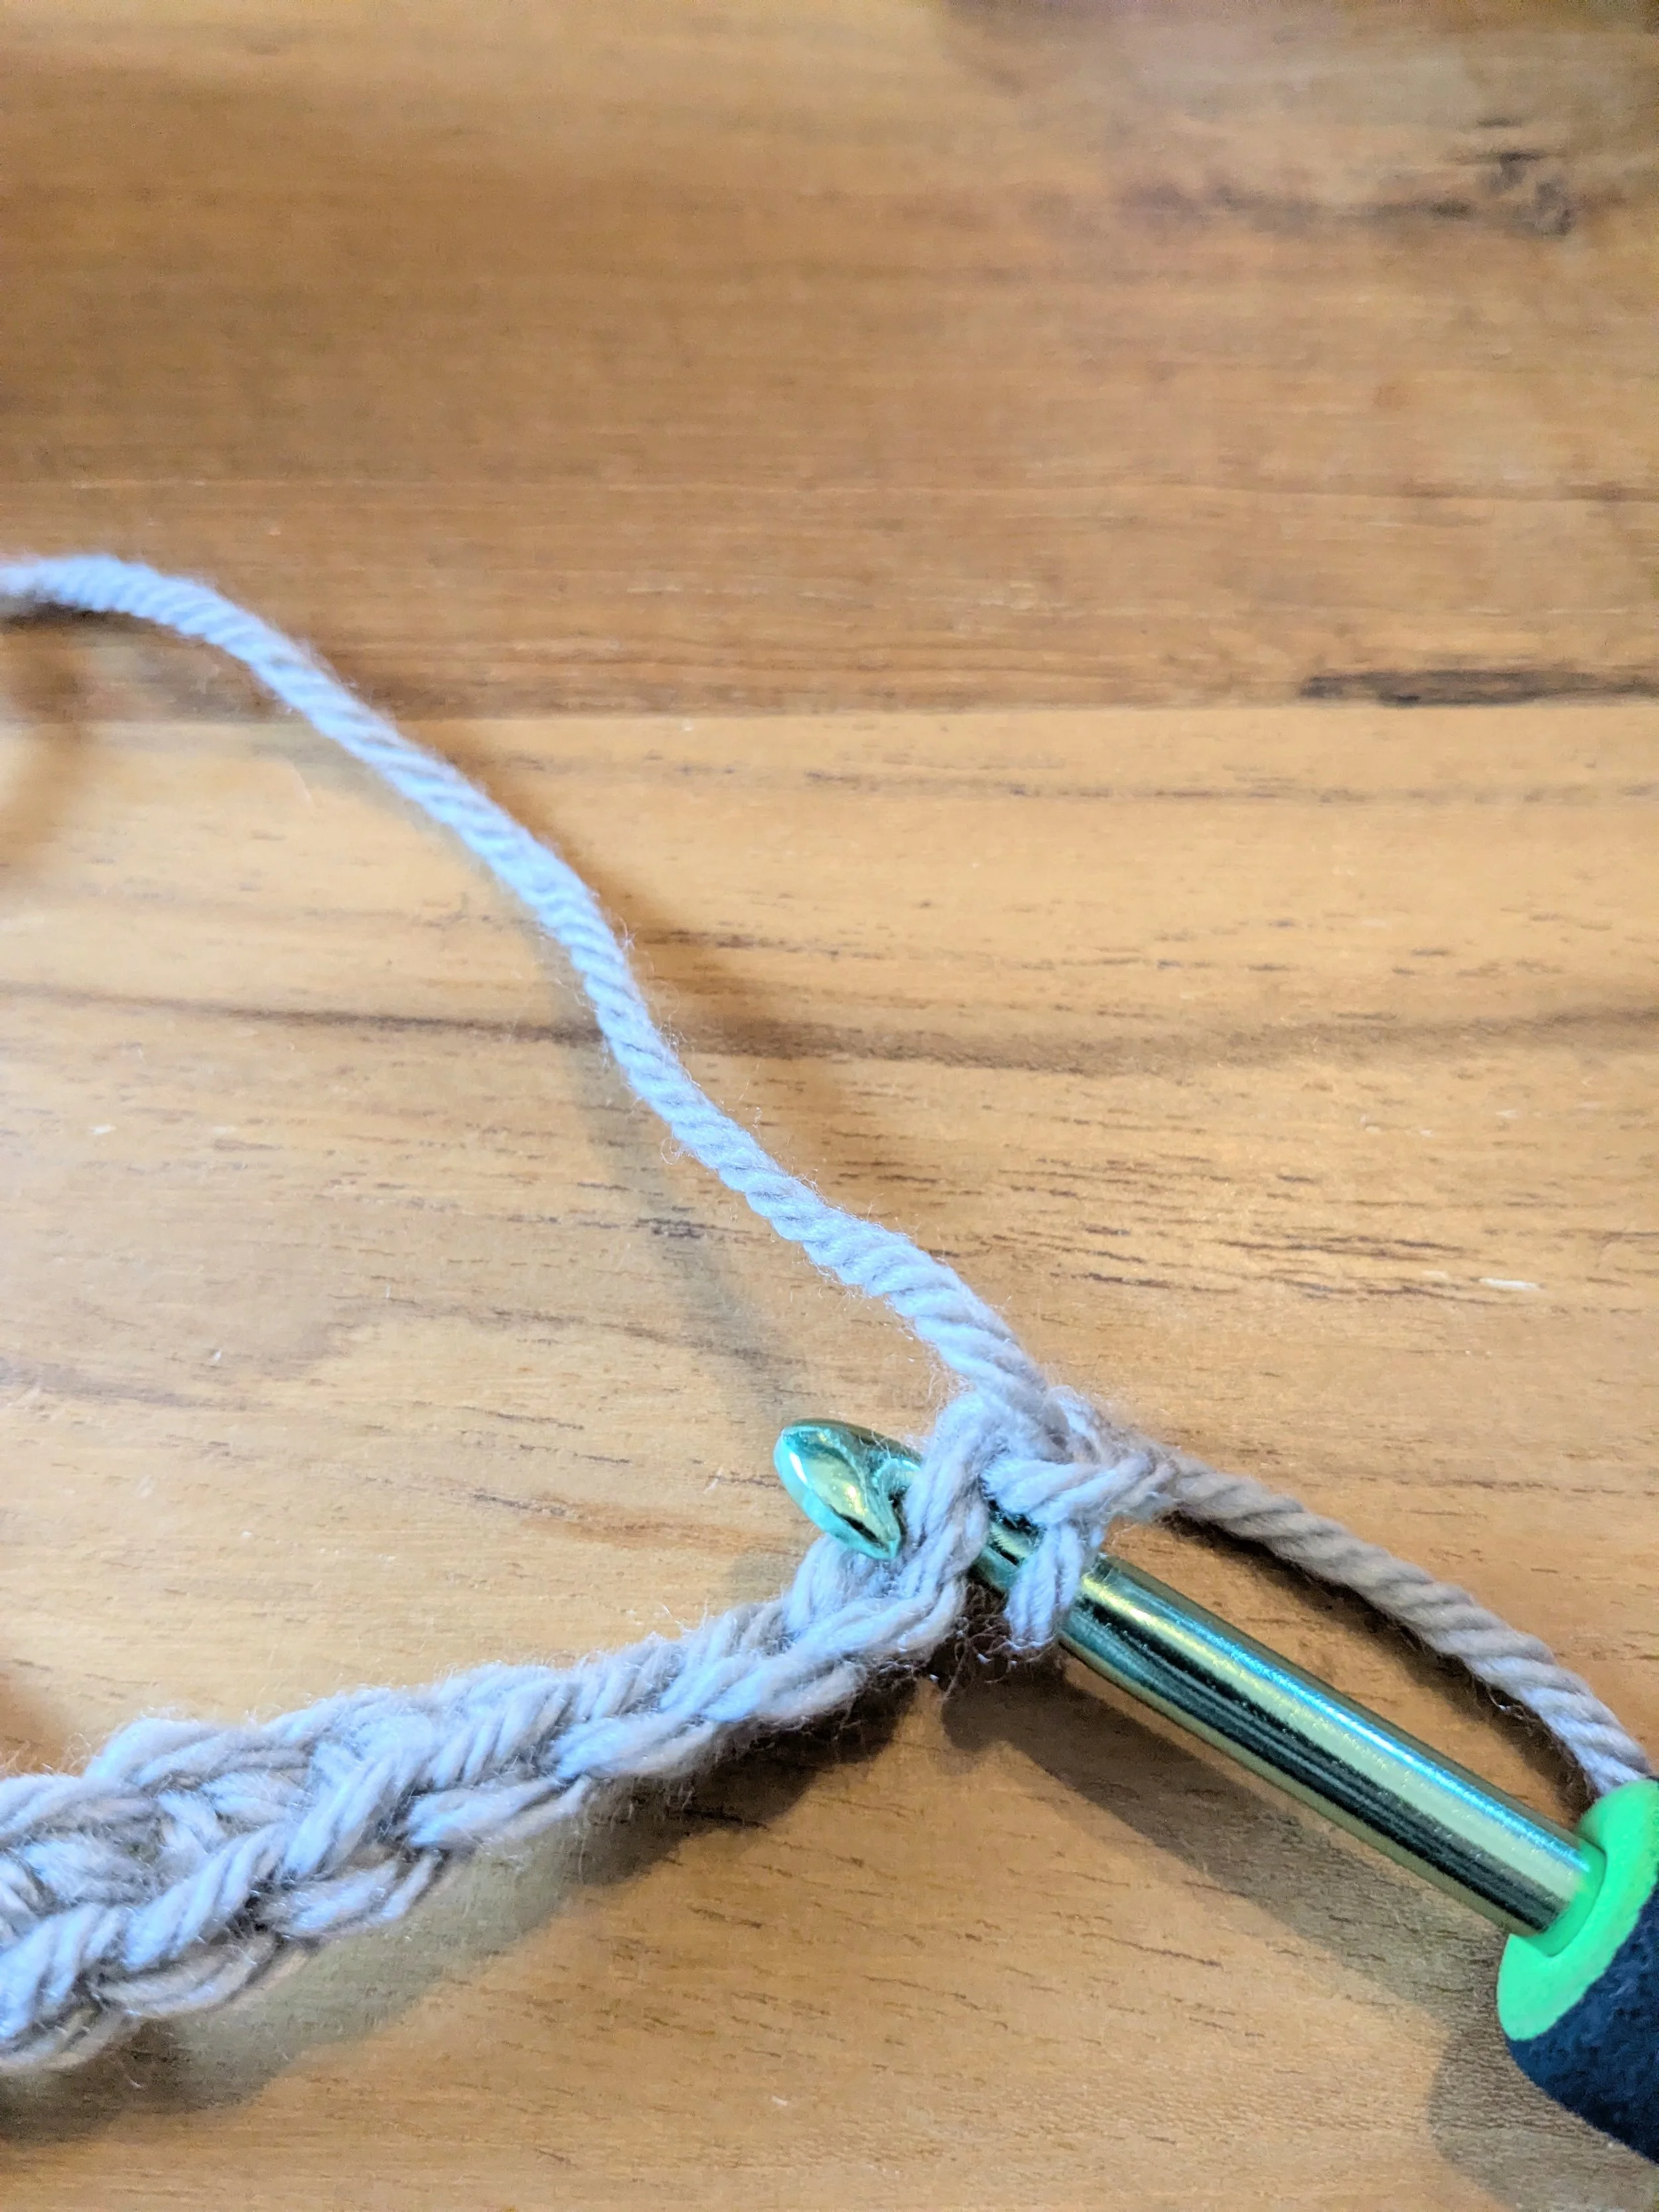
Wrap working yarn around hook (called "yarn over" in written patterns) and pull through the loop on your hook. This is a single chain stitch.
Make a total of 80 chains. Try to make the chains all look the same size as you go. If you make a chain that you don't like, just pull your working yarn a little to undo the stitch and try again. When you have 80 chains that you are happy with, cut your working yarn and pull it through the loop on your hook to make a knot.
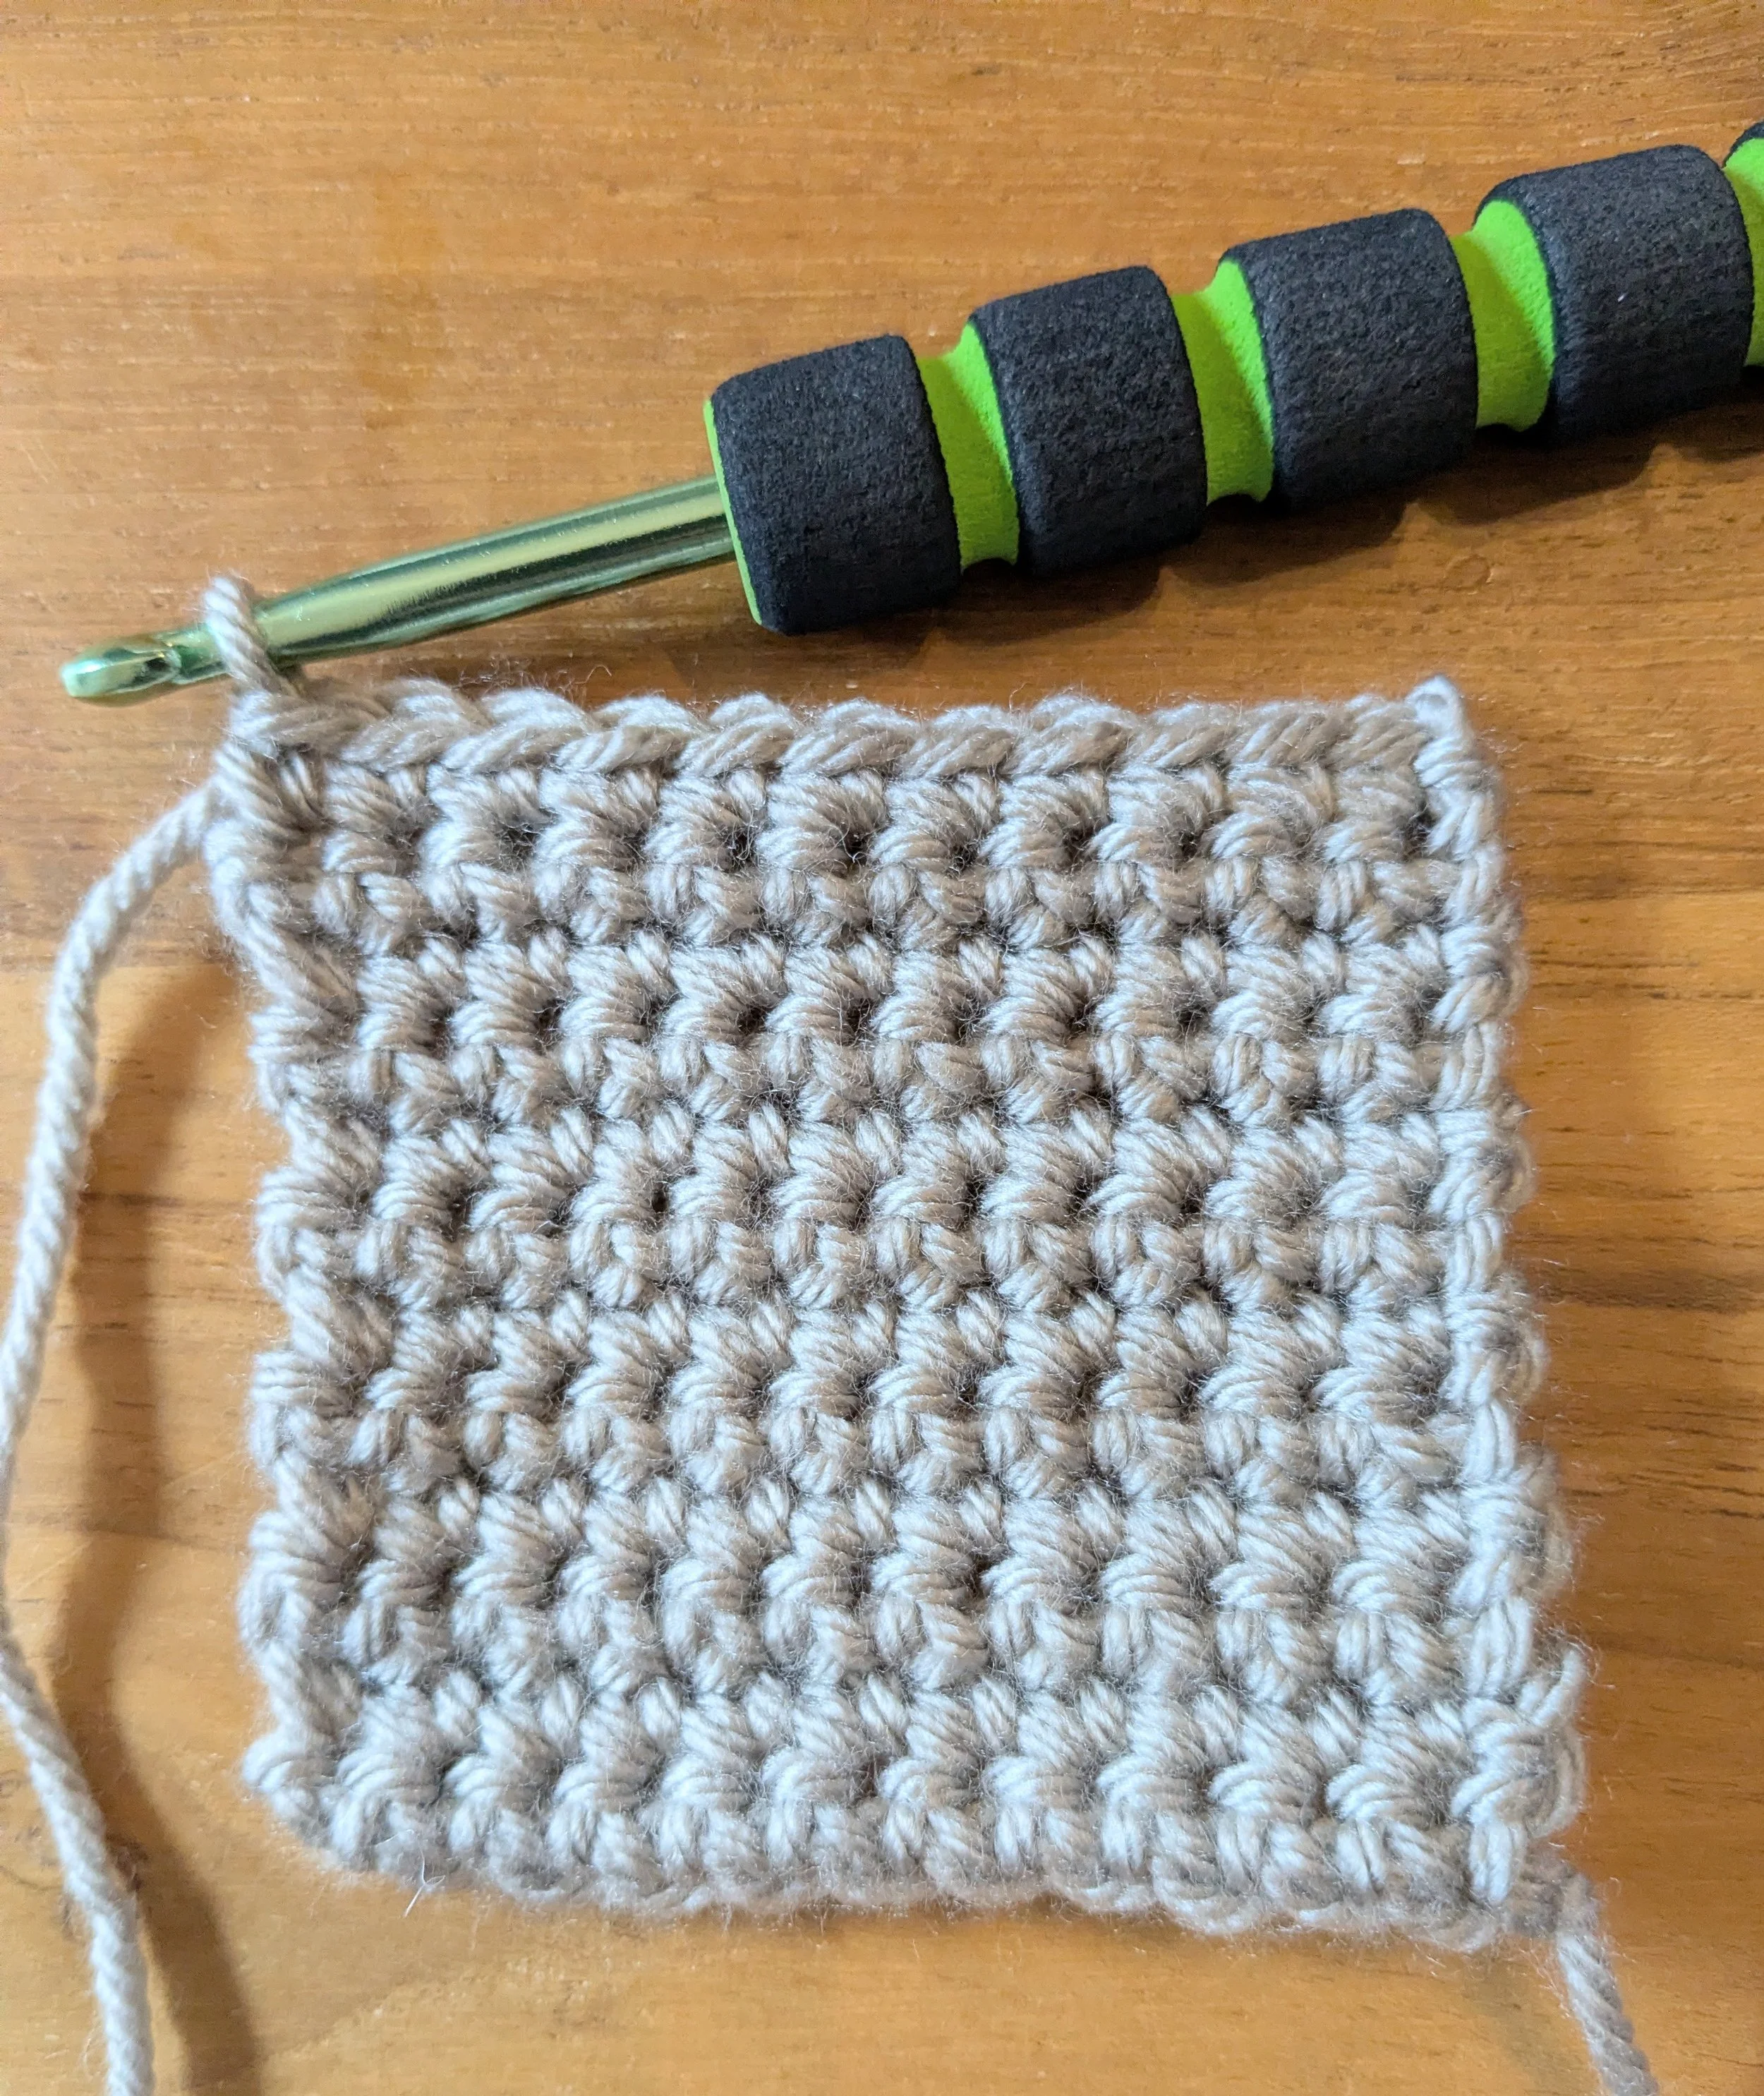
How to Make a Square Piece of Fabric
This will be a flat piece of fabric worked in horizontal rows using the single crochet (sc) stitch. Single crochet is a one of the simplest stitches in crochet and is very common. This piece is the bottom of your bag.
Ch 12 (make a foundational chain with 12 chain stitches).
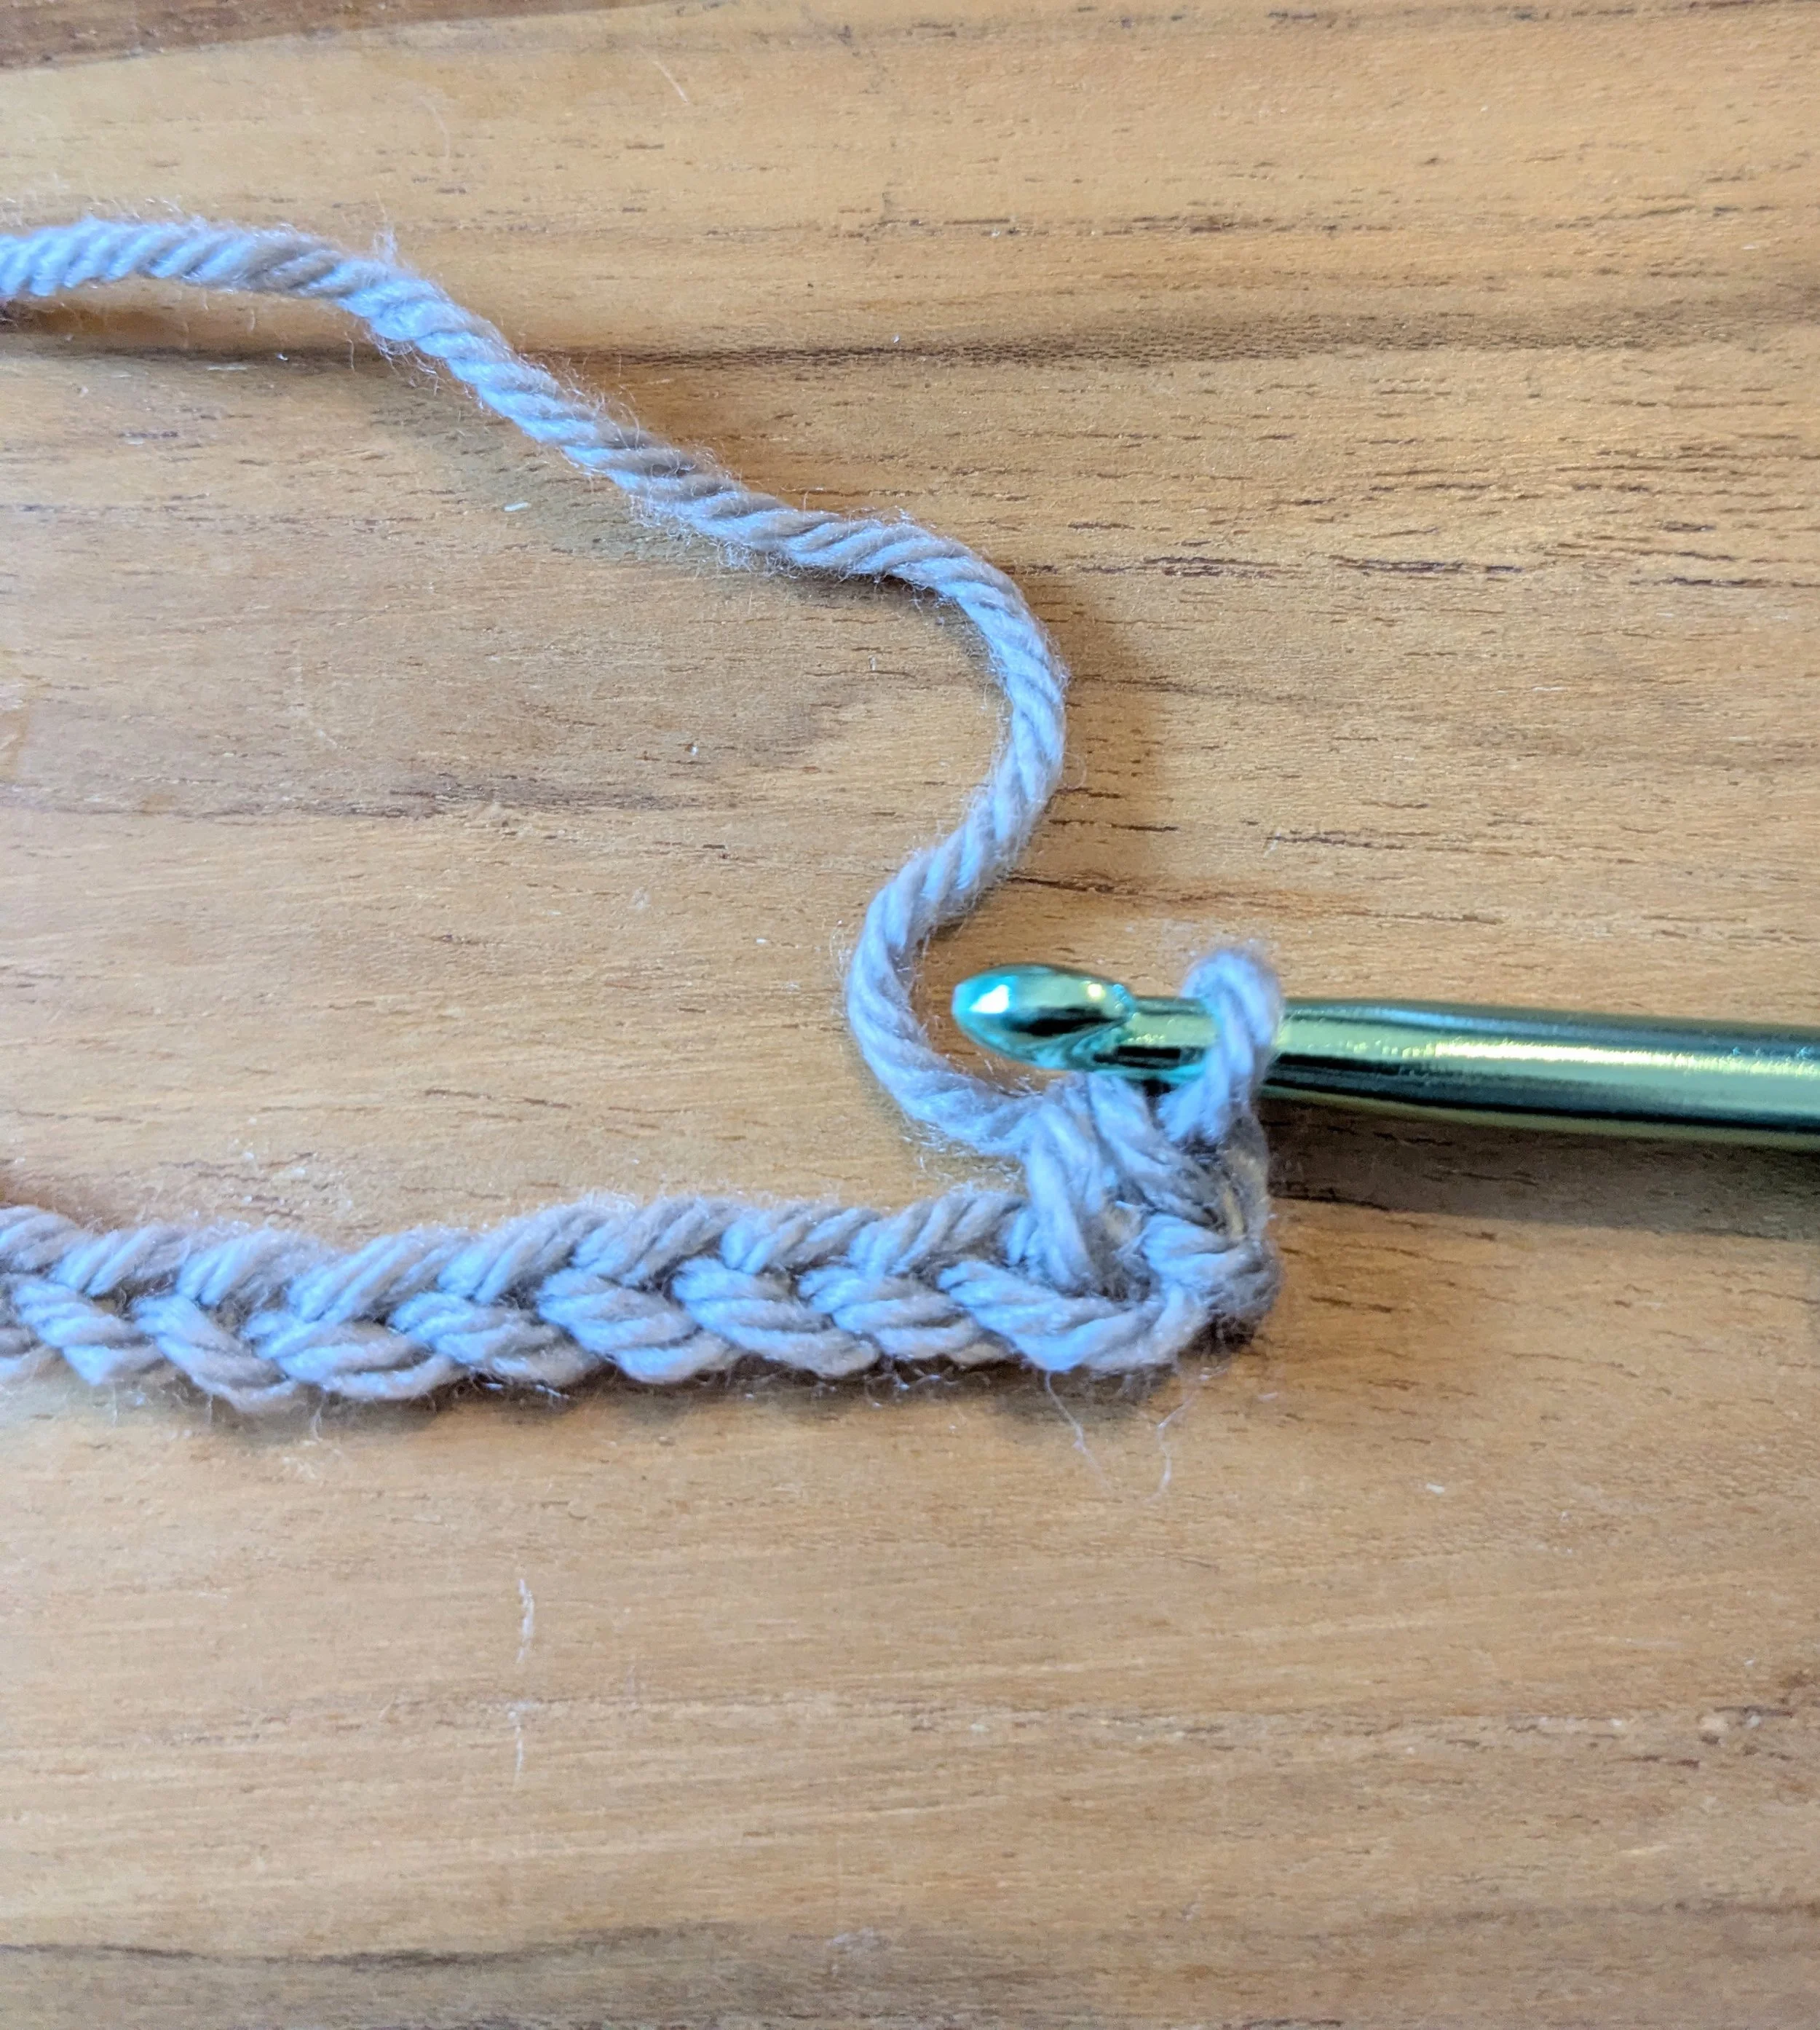
Row 1: Sc in 2nd ch from hook and it each chain across, turn your work. (11 total sc made - count your stitches to be sure you have the right amount).
Make a sc by inserting your hook in the "V" of the second chain from your hook, then yarn over and pull a loop of yarn through the V.
Now that you have two loops on your hook, yarn over and pull through both loops.
Make a sc in each ch across. At the end, turn your work around.
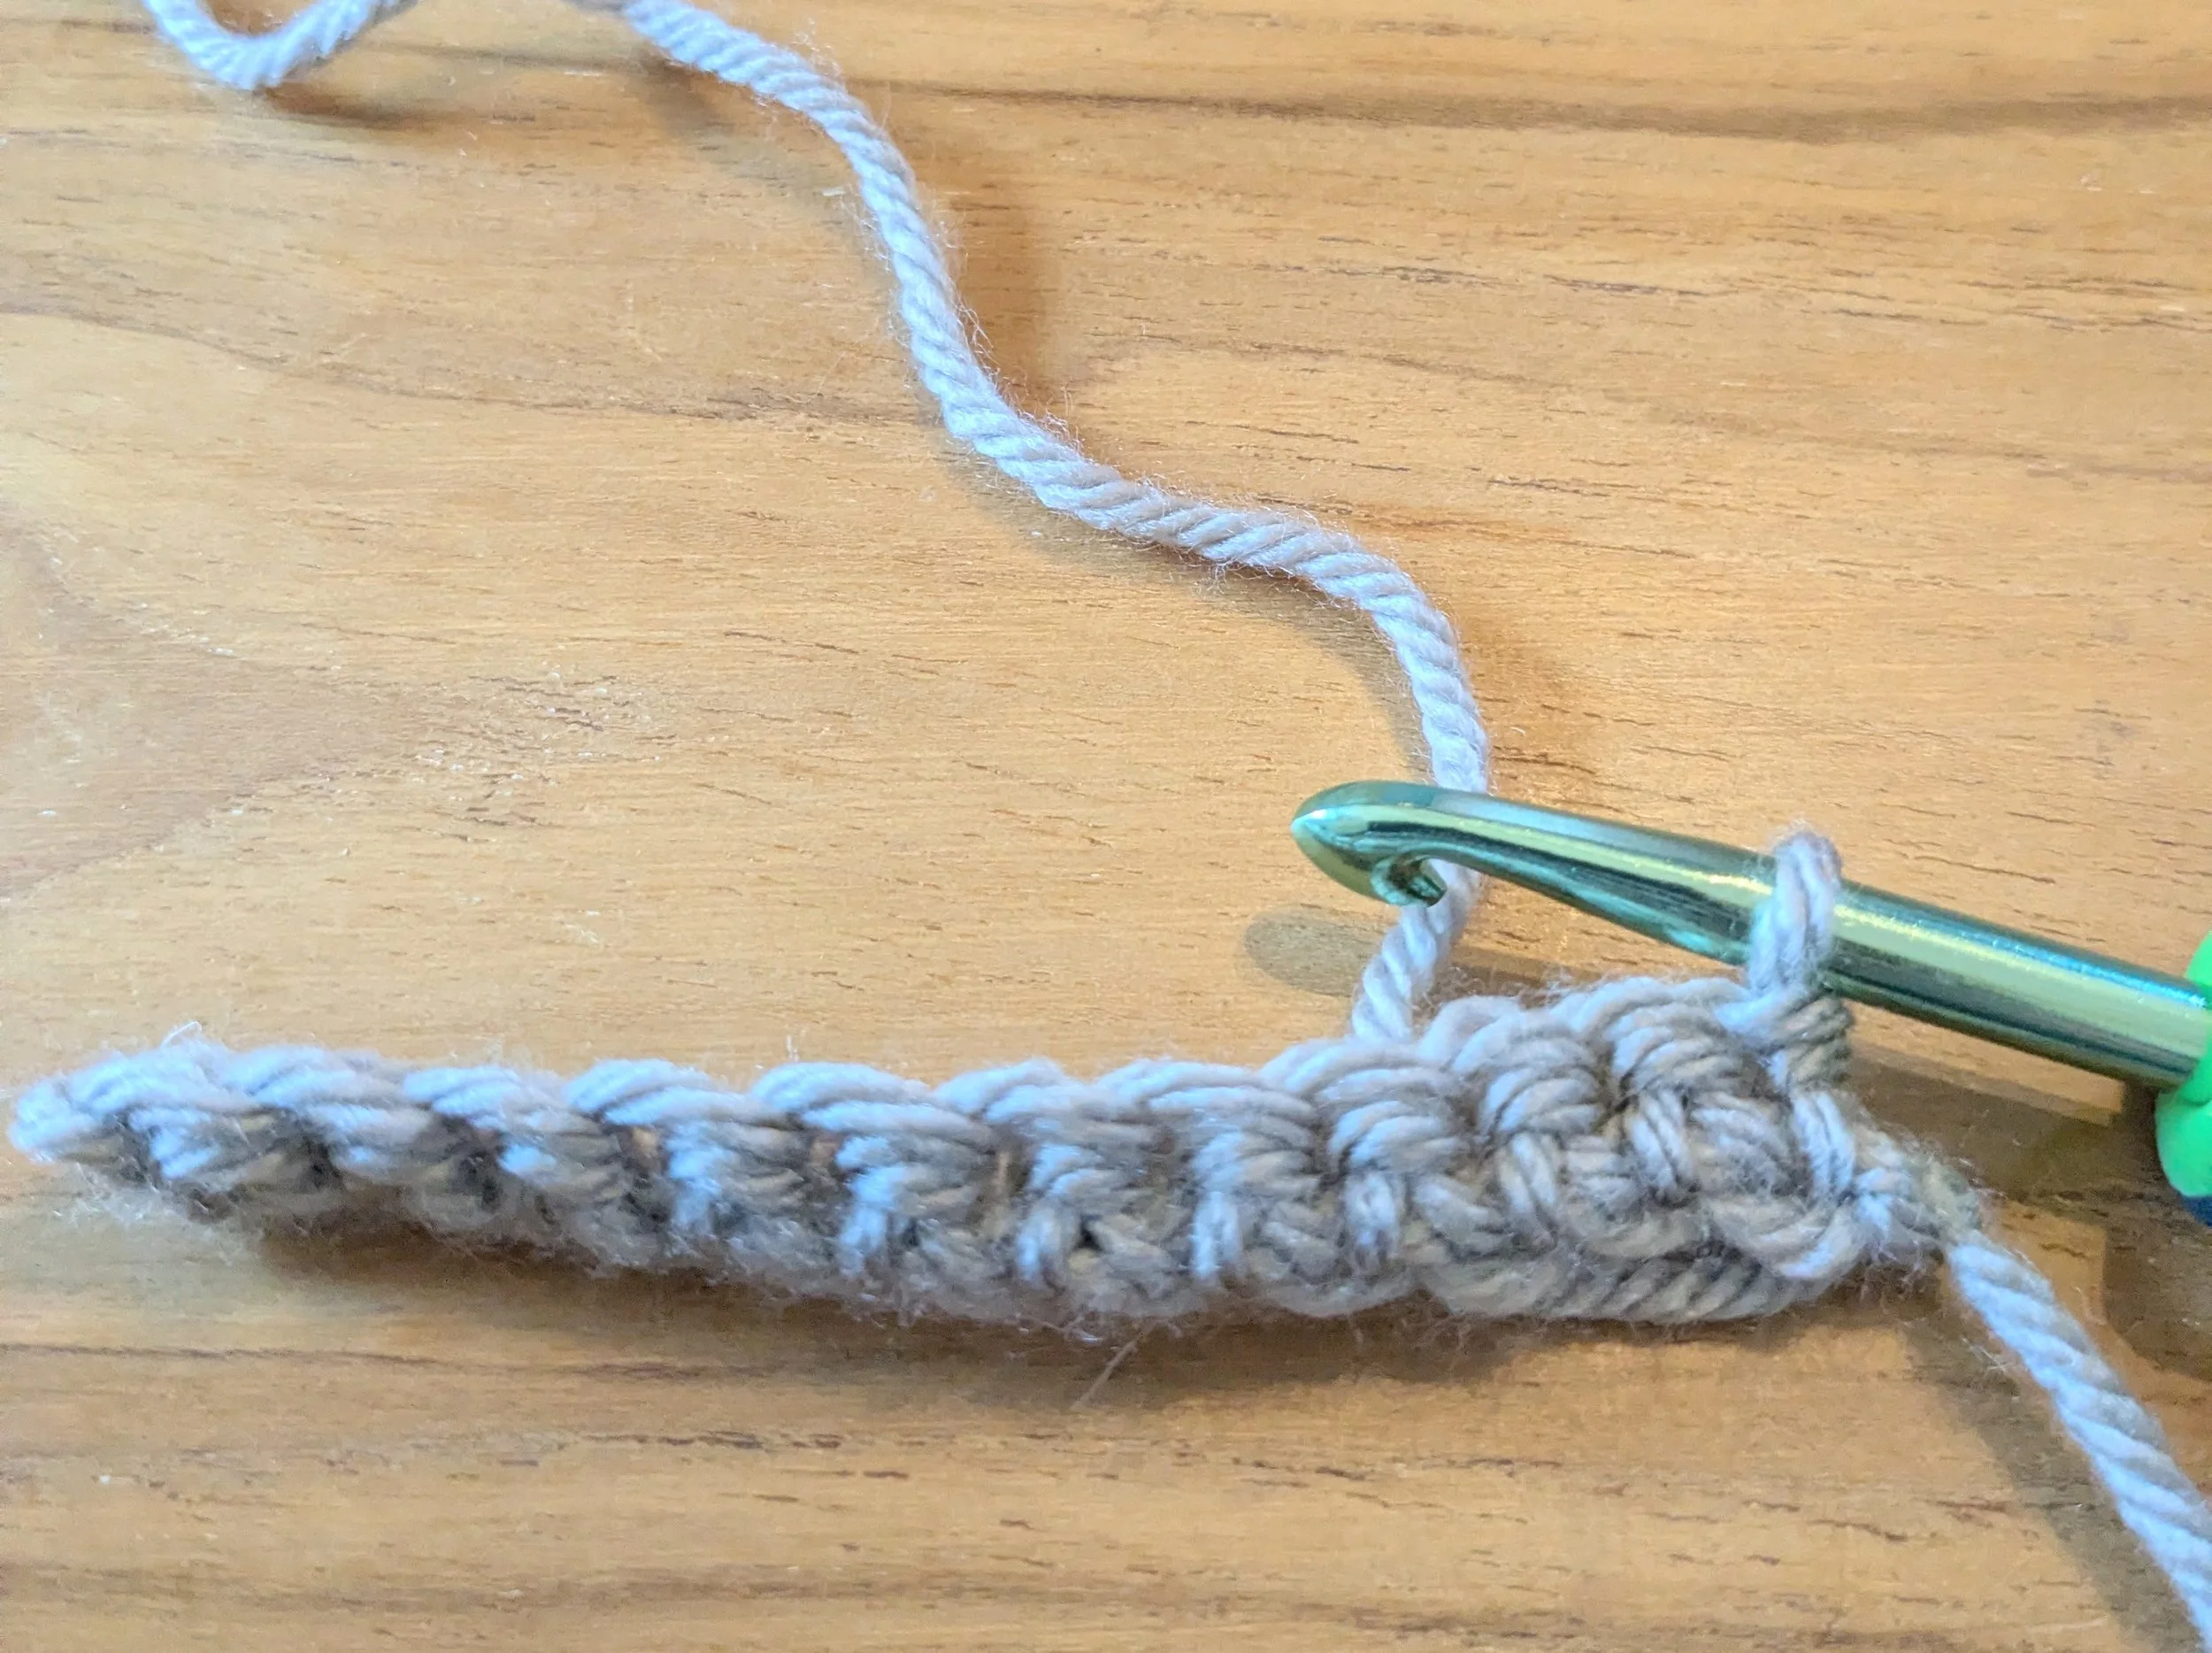
Make a sc in each ch across. At the end, turn your work around.
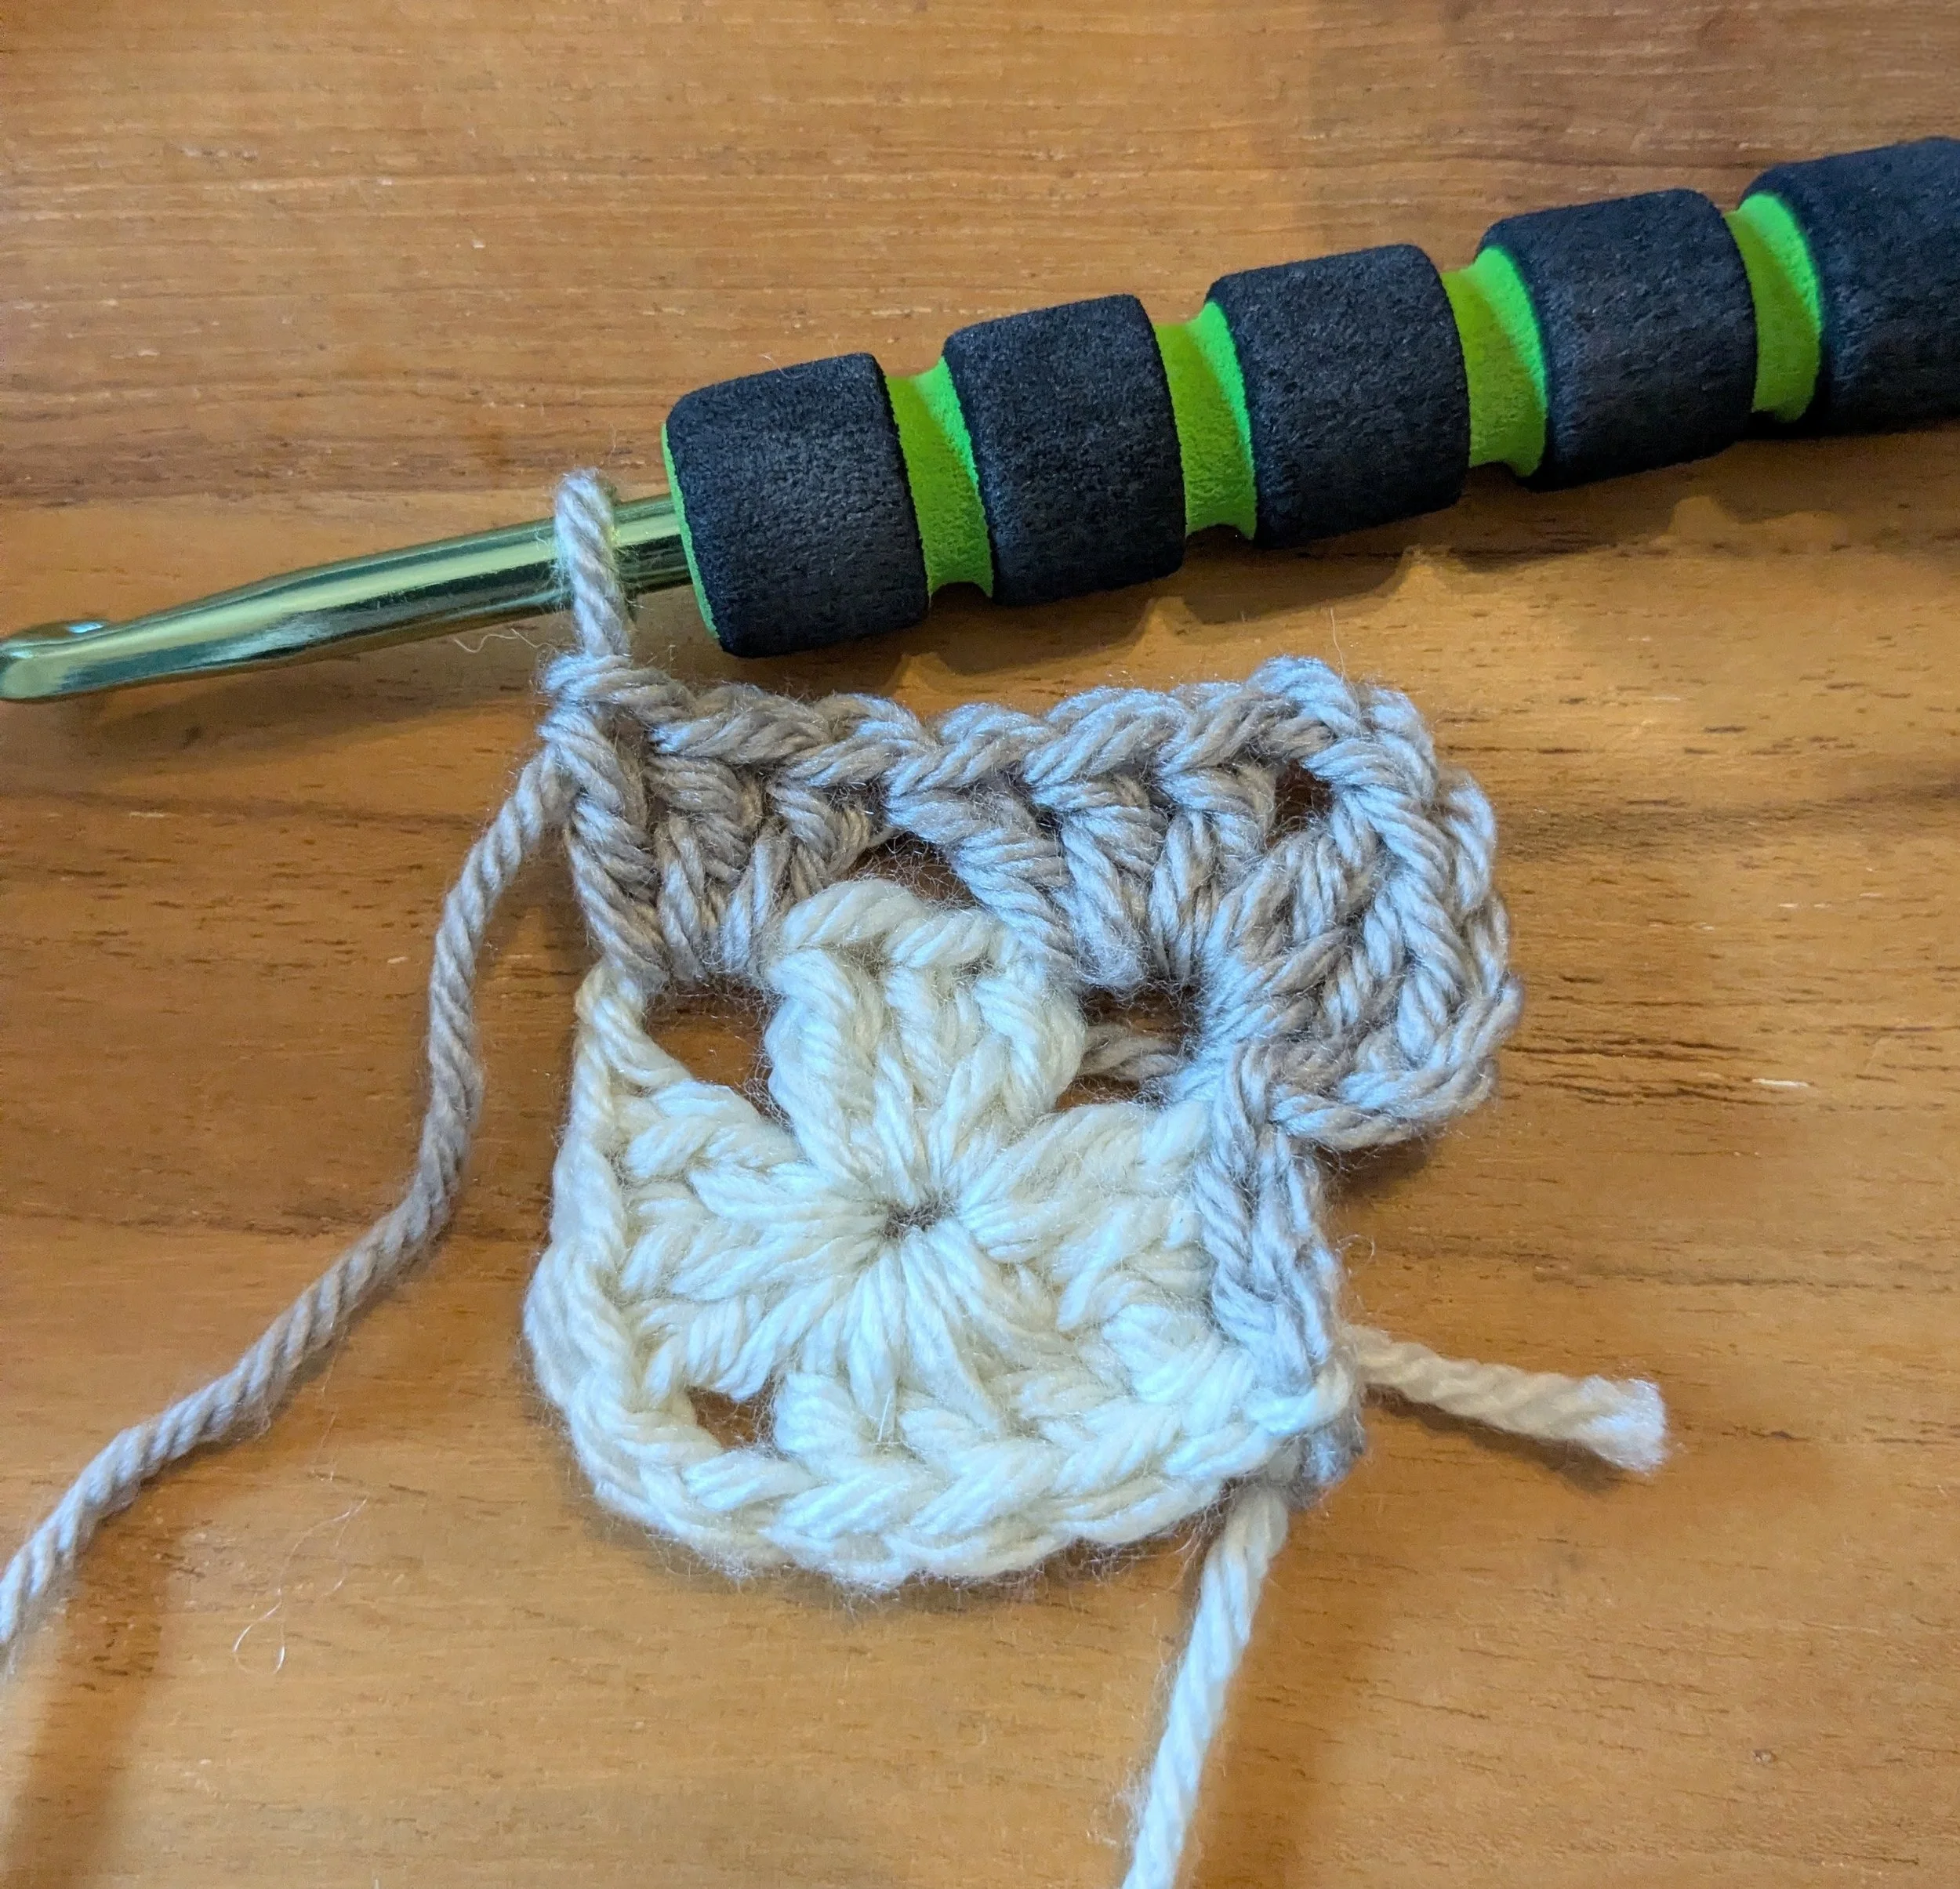
How to Make a Granny Square
This is a flat piece of square fabric worked "in the round" or continuously going around the work instead of turning at the end of a row (think about drawing a spiral). For this we will try a new stitch called “double crochet”.
You need to make 4 granny squares.
Ch 3, slip sitch (sl st) in first chain to make a ring.
Round 1:
With Color A, Ch 3, make 2 double crochet directly into the center of the ring.
To make a double crochet (dc) first yarn over, then insert your hook in the center of the ring, yarn over and pull through. Now with three loops on your hook, yarn over again and pull through only the first two loops. Yarn over one more time and pull through the last two loops.
Once you’ve made 2 dc in the ring, then ch 2.
Next make (3 dc in the ring and ch 2). Repeat the steps in ( ) two more times. After that, sl st in the top of the ch 3 from the beginning of the round.
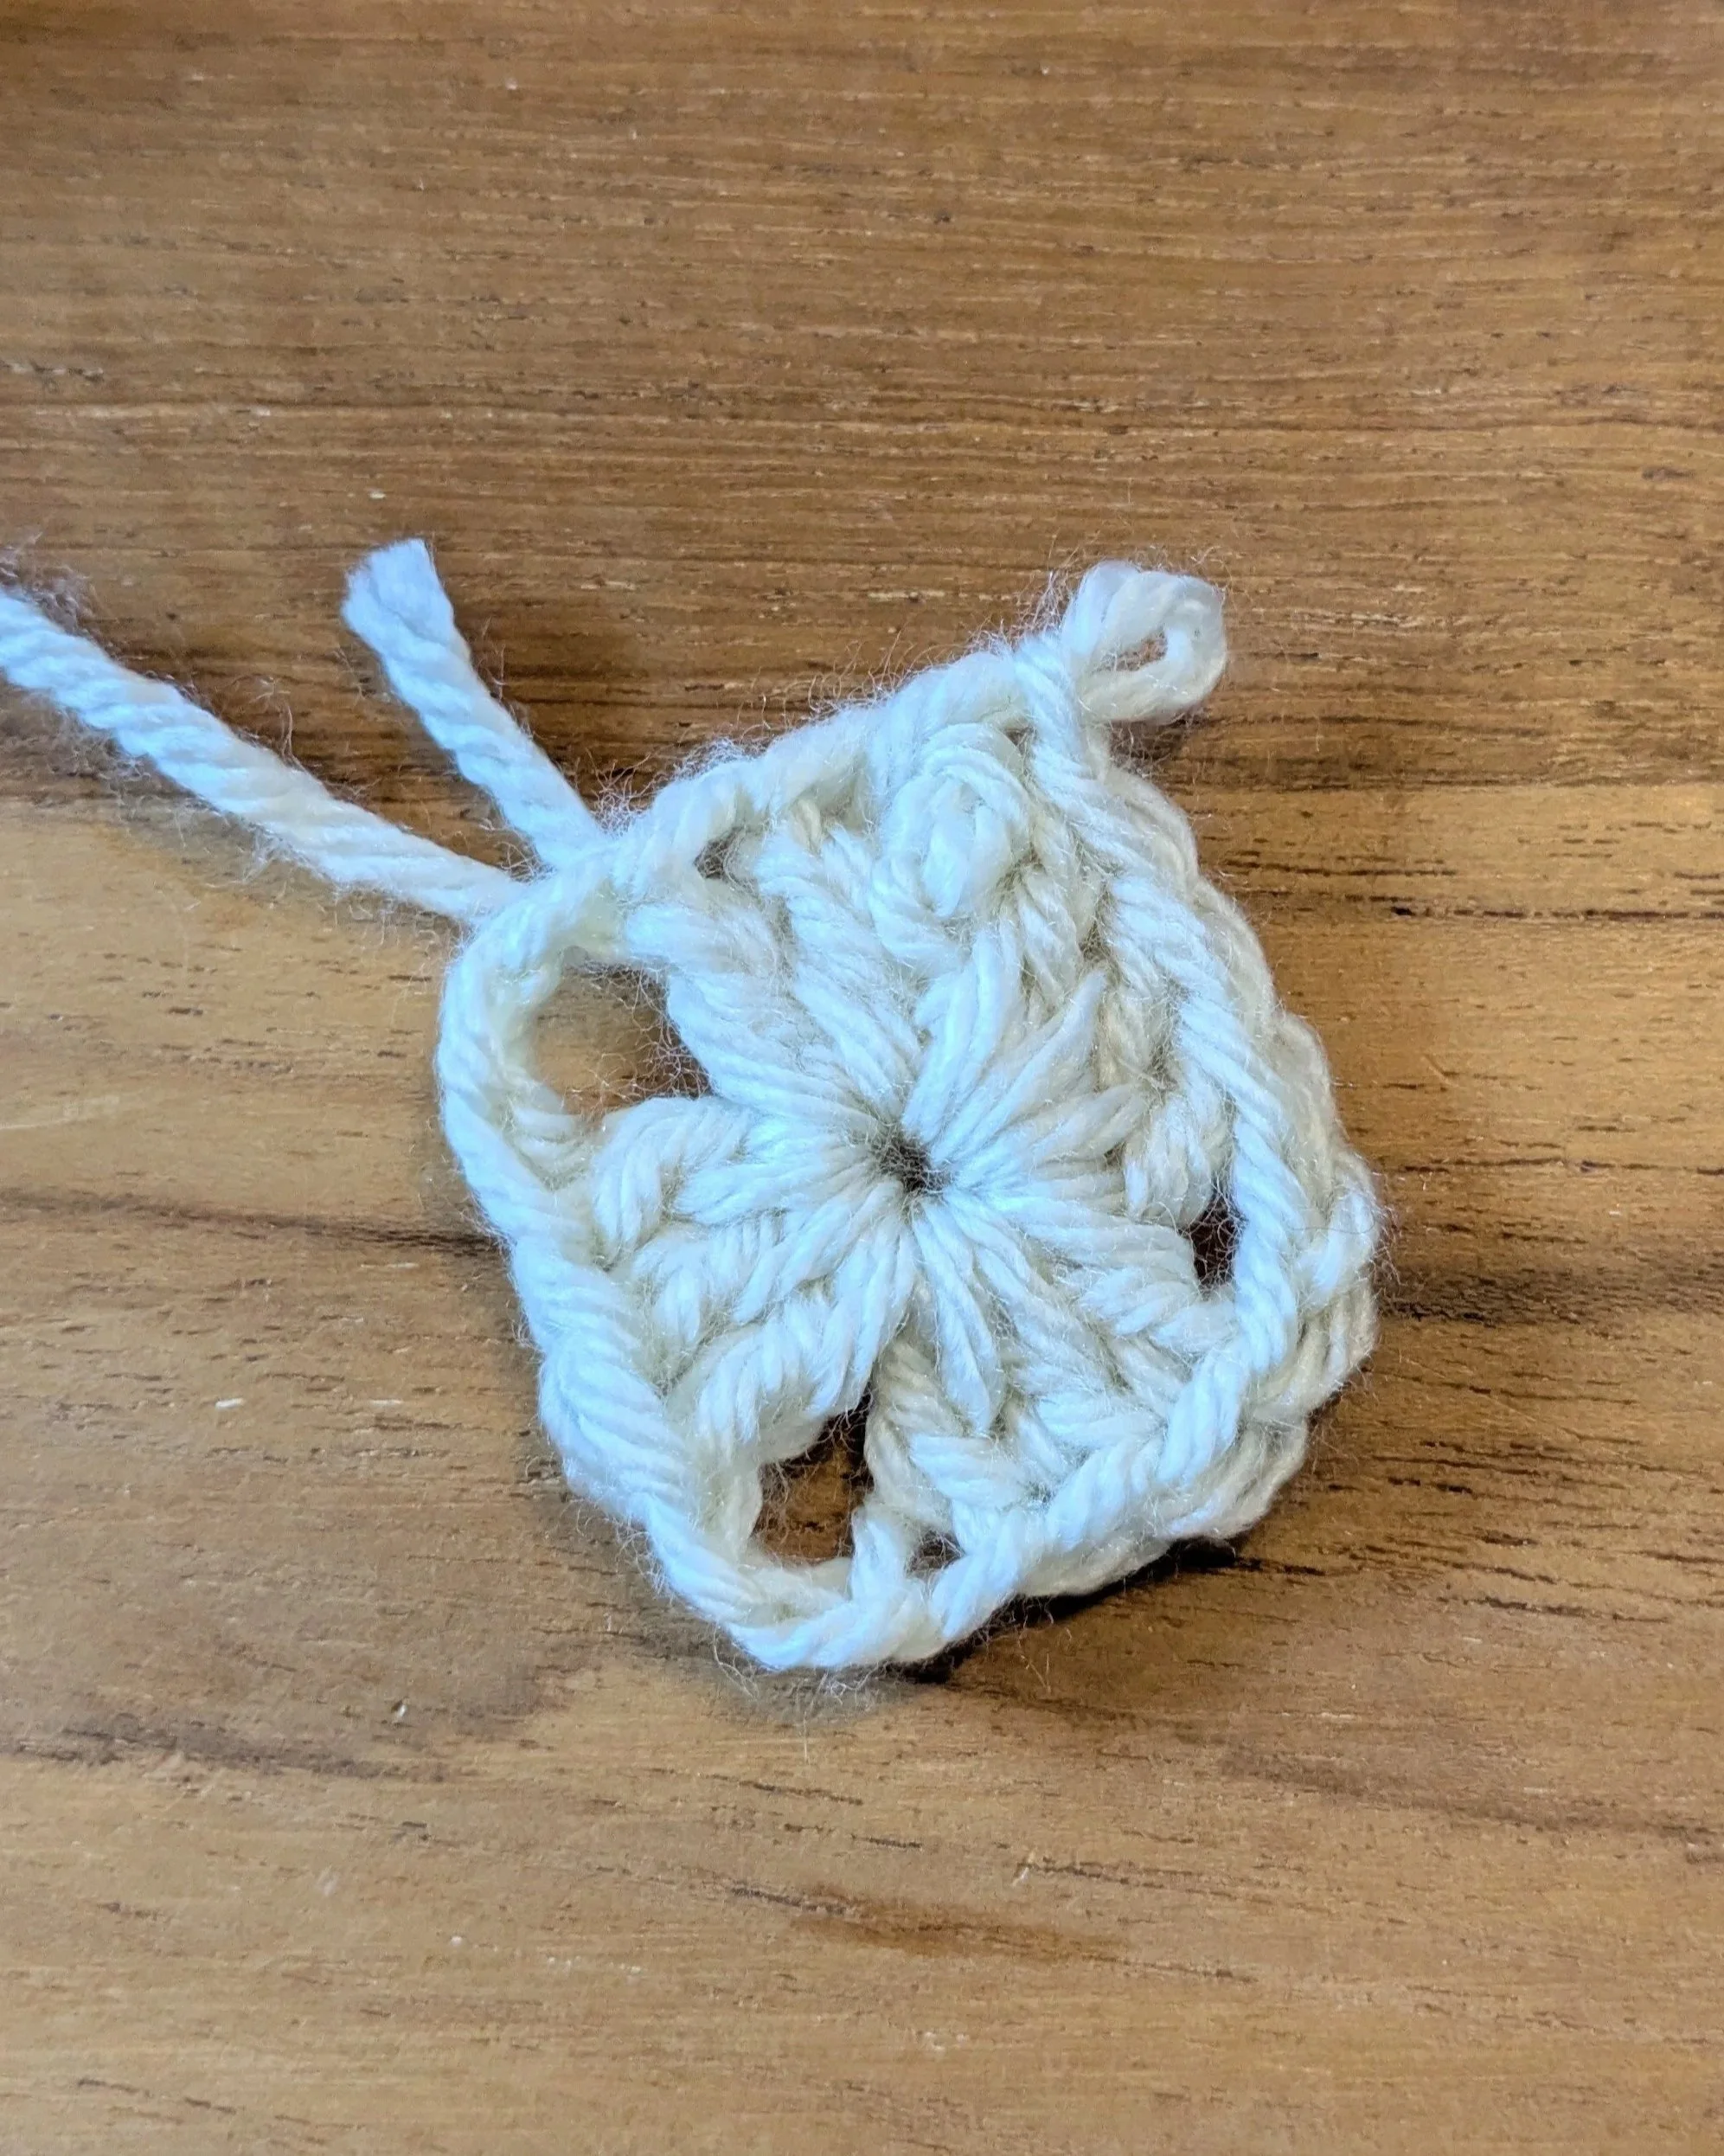
Color change: Yarn over color B and draw through the loop on your hook. Pull color A tight so the loop is secure within the stitch. Color B is now your working yarn. Be sure to knot the tails together.
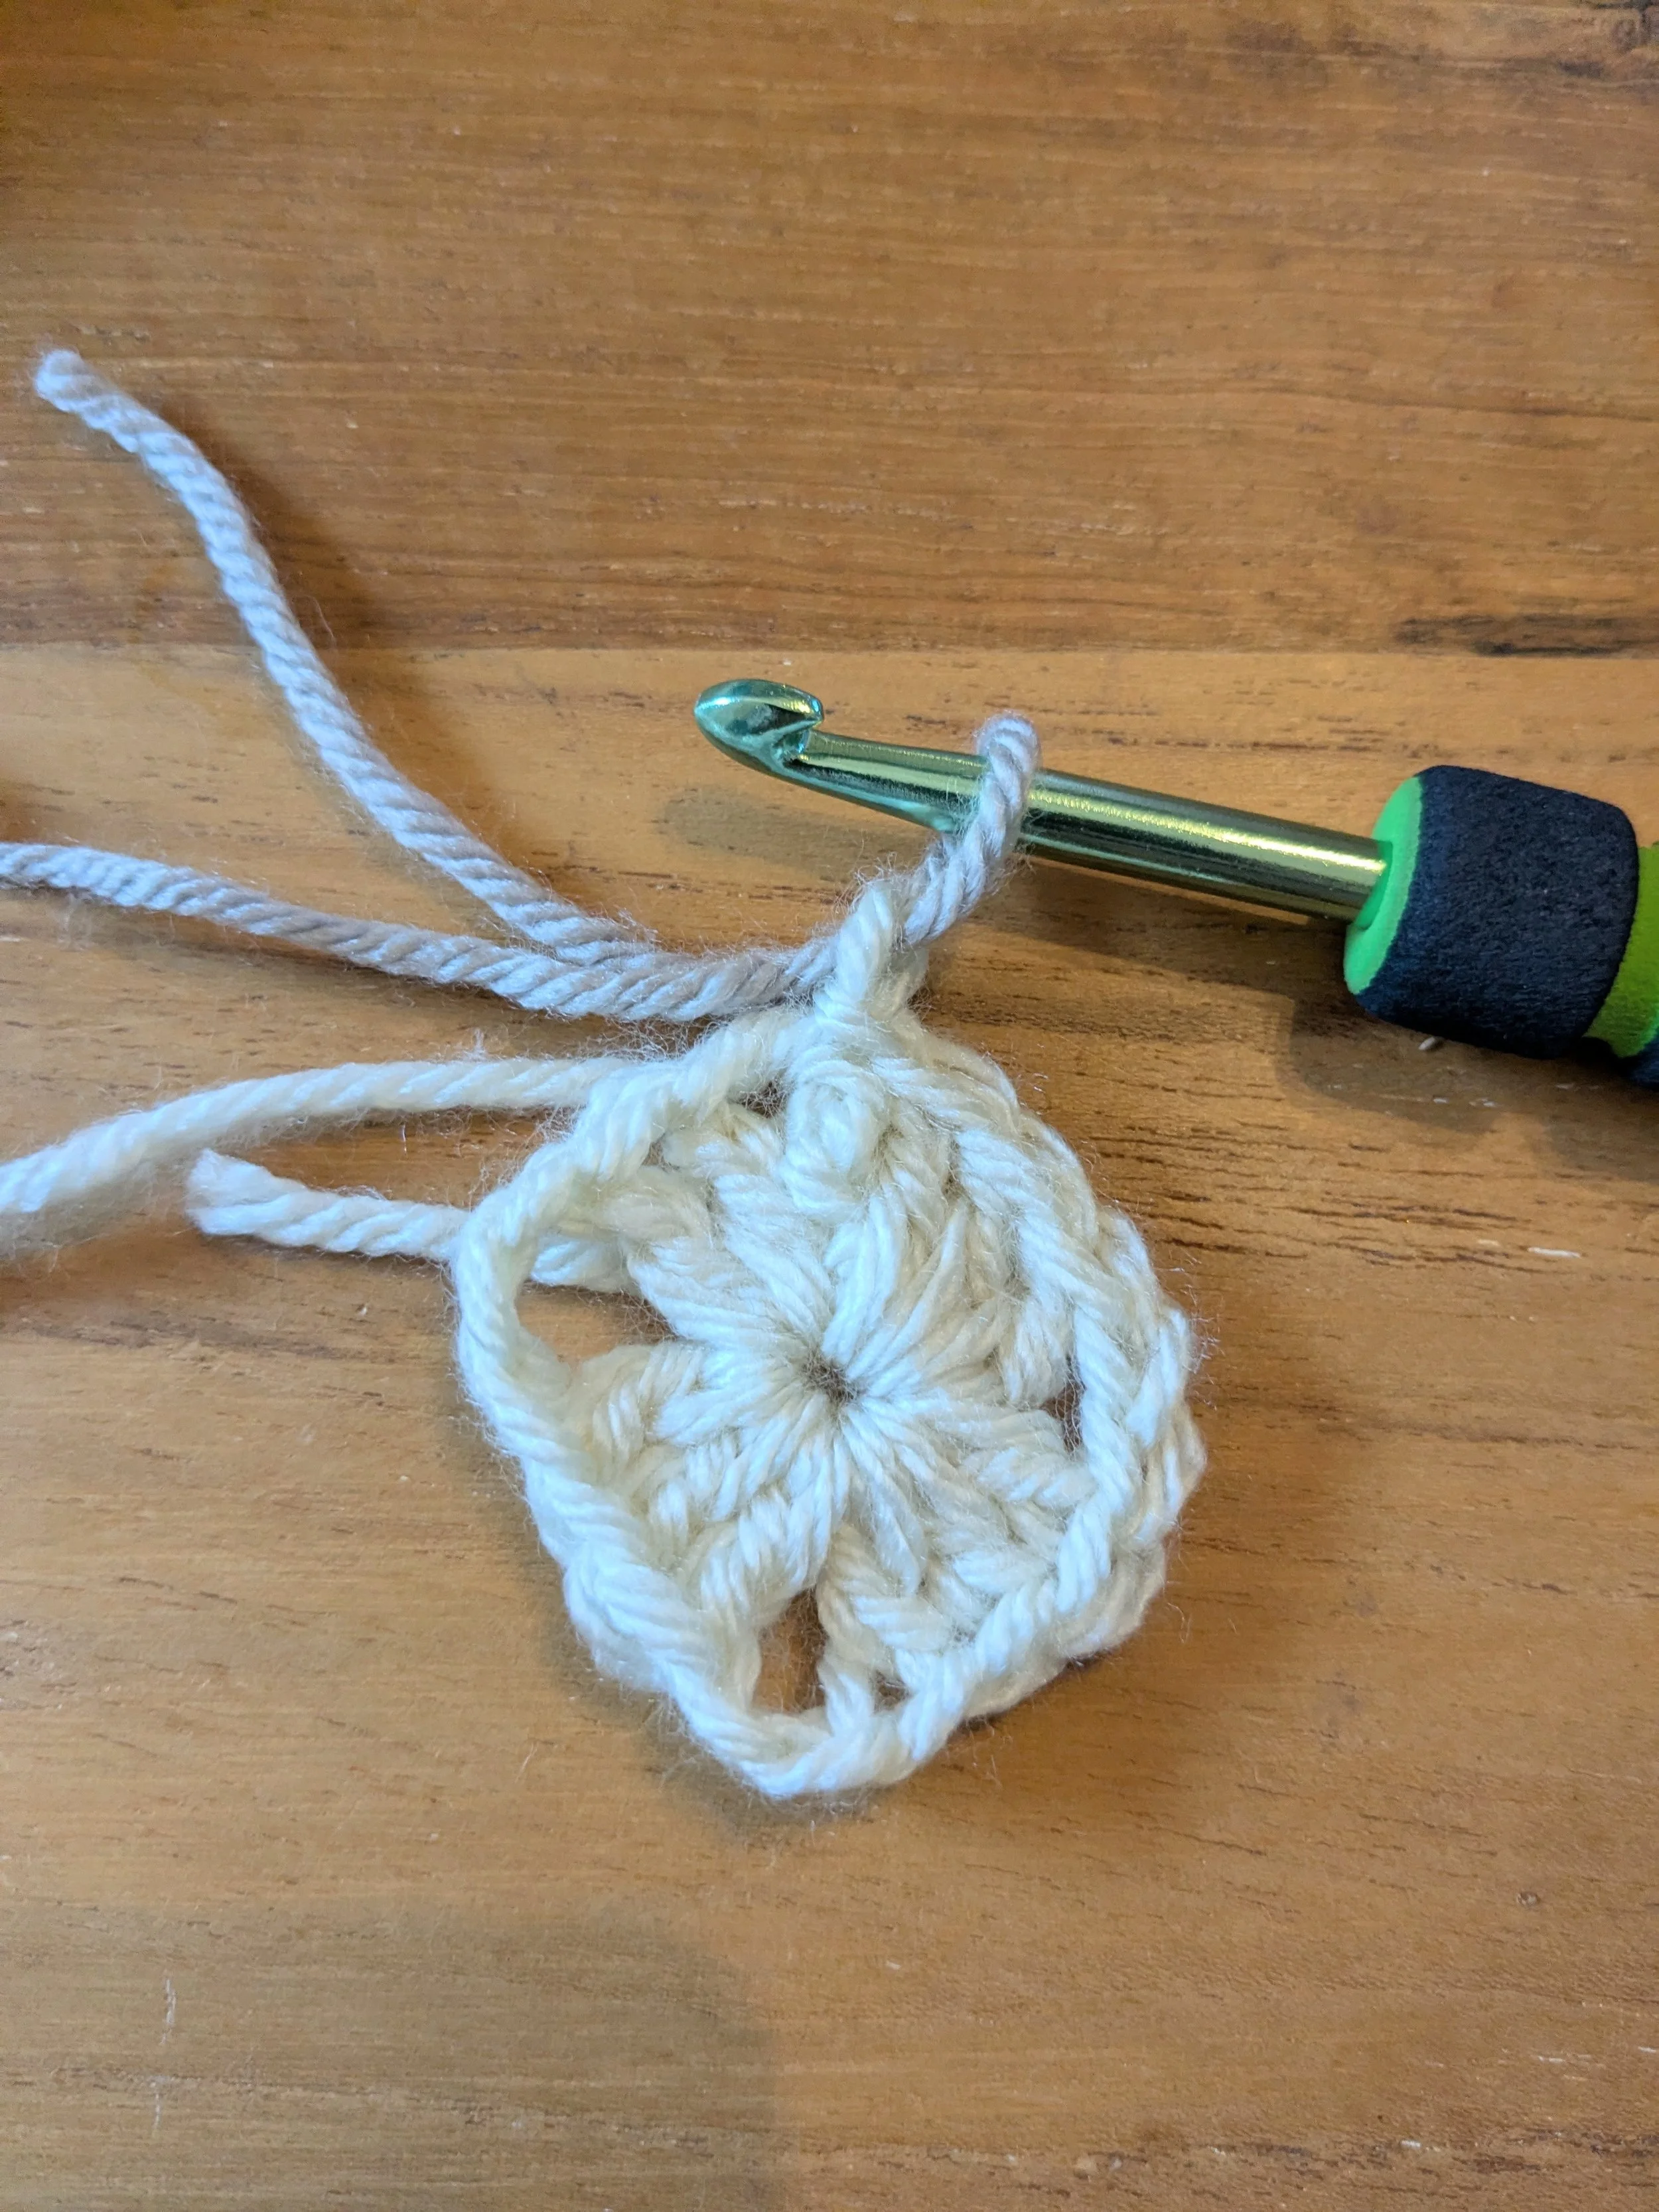

Round 2:
Sl st in next dc, then sl st in to corner space.
Ch 3. 2 dc, ch 2, 3 dc in space.
(3 dc, ch 2, 3 dc) in each corner space around.
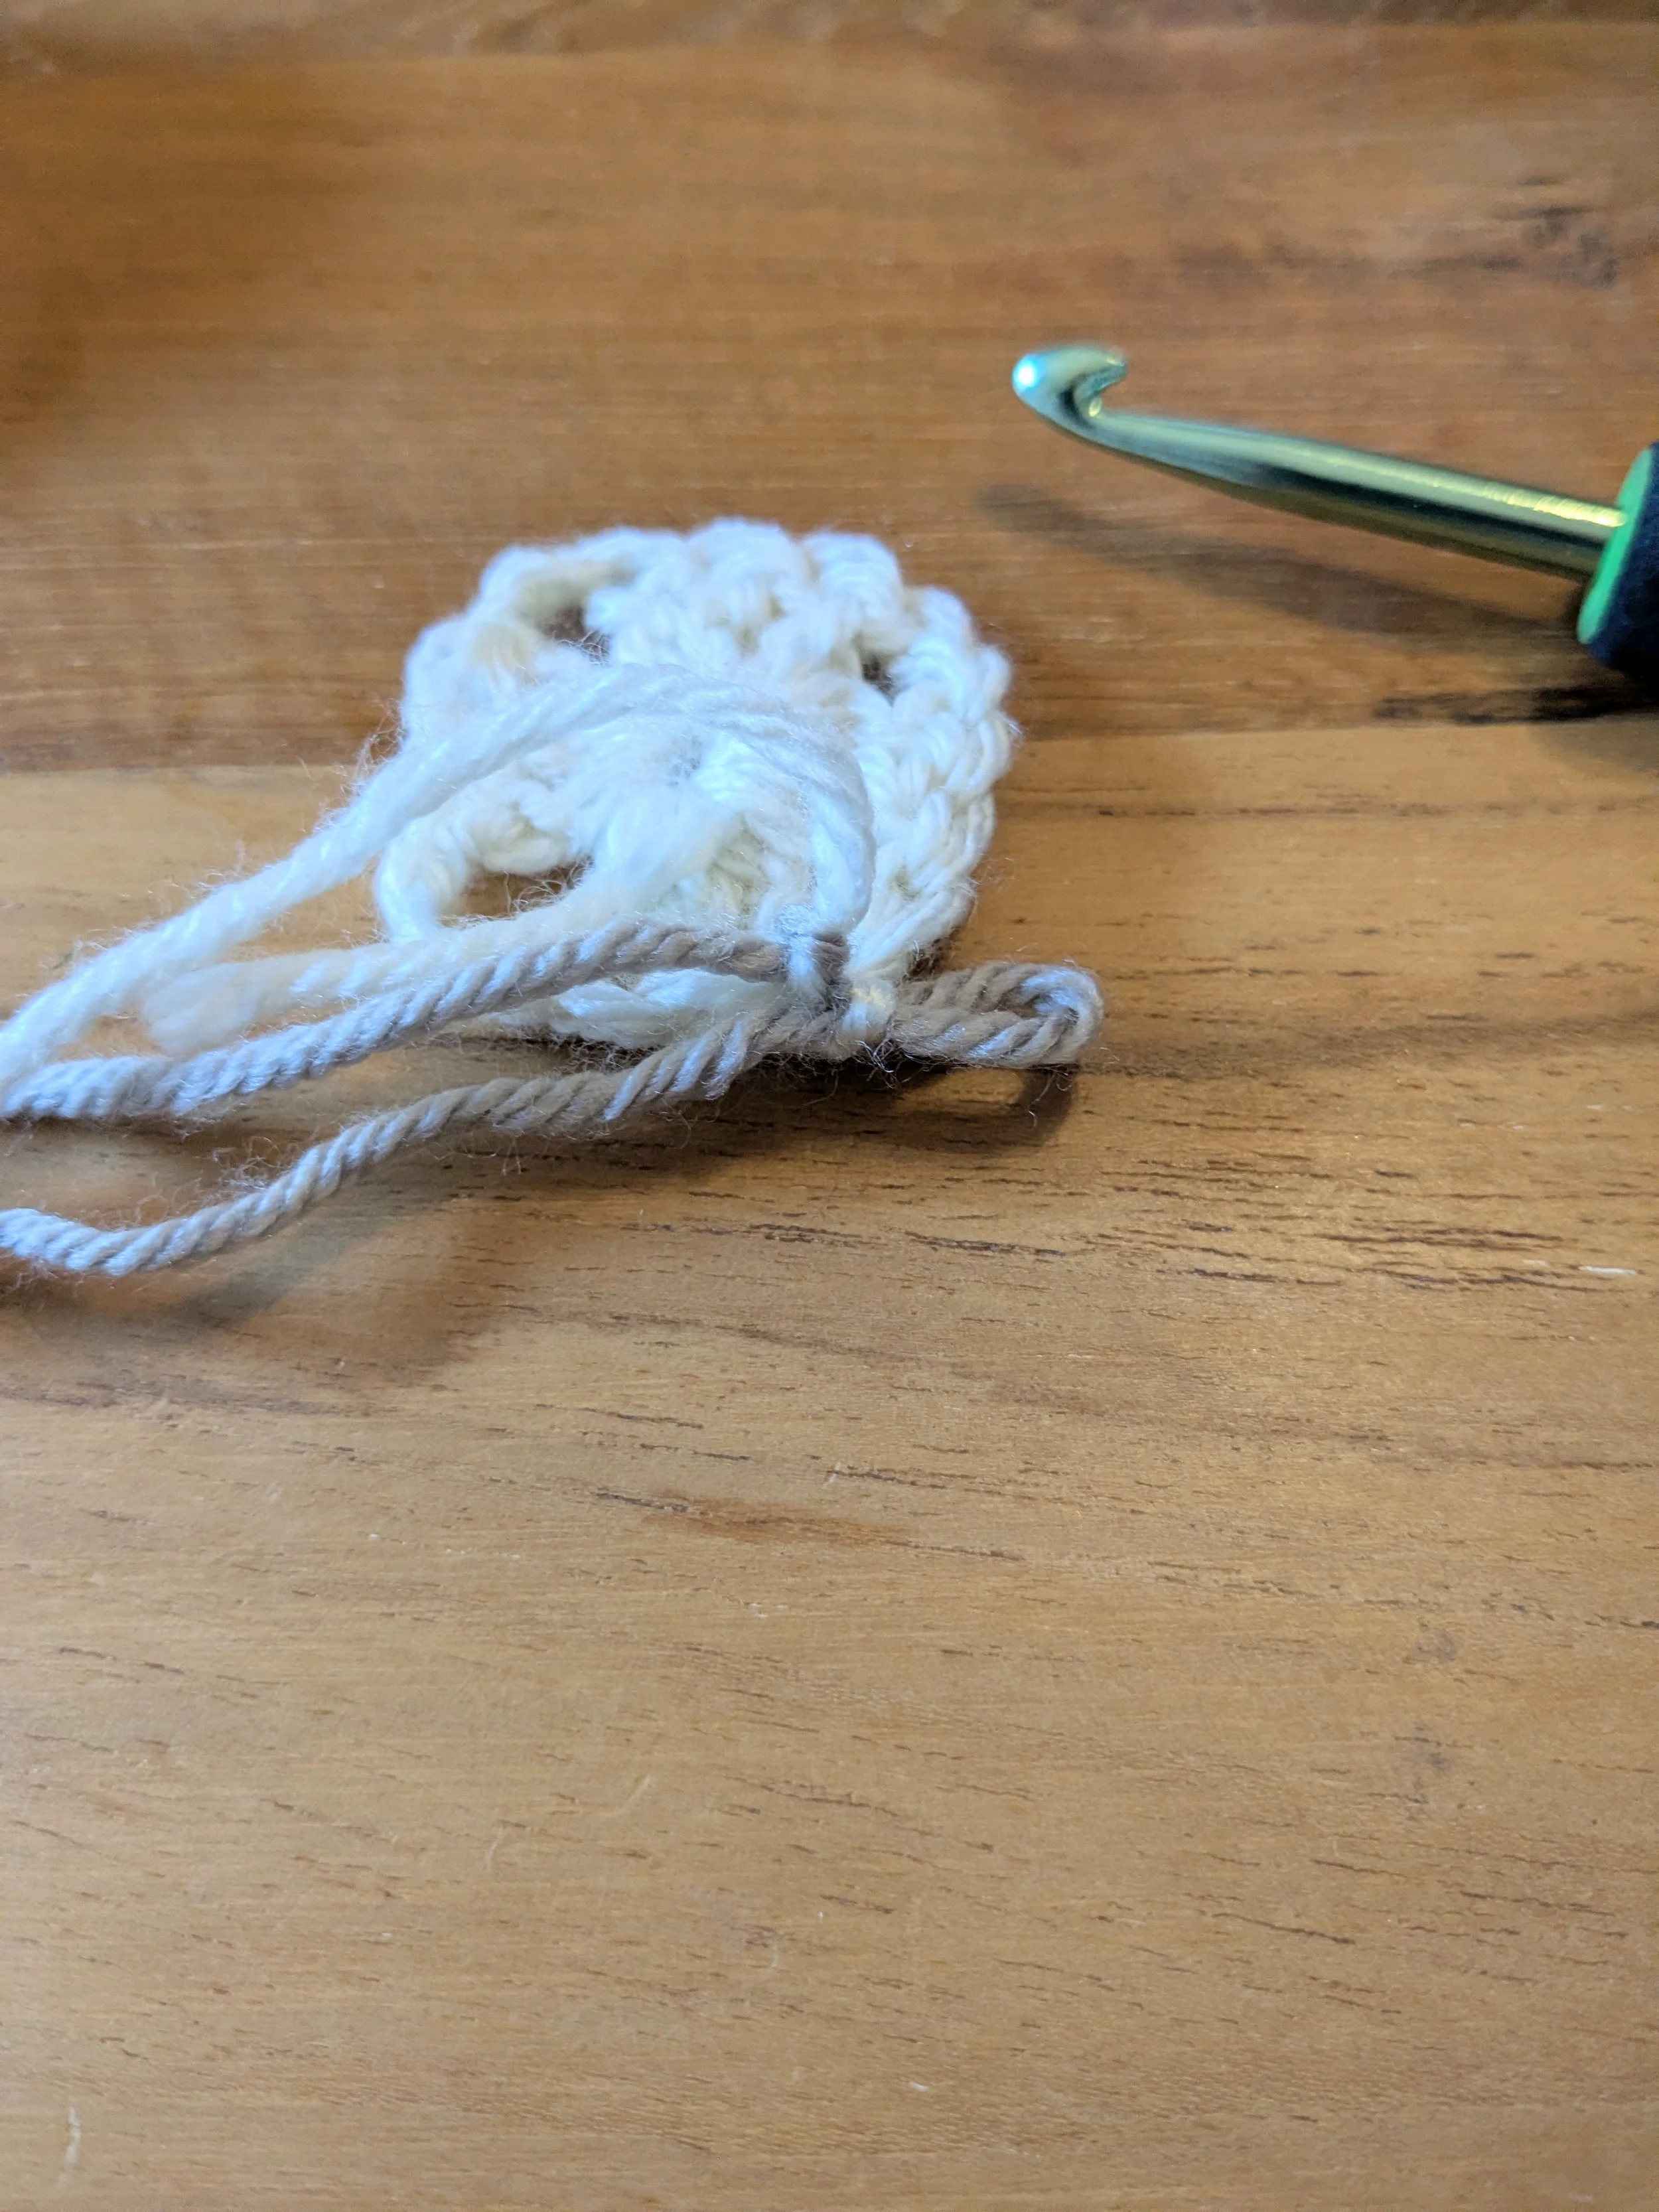
End with sl st in top of ch 3. Change colors.
Color change: Yarn over color A and draw through the loop on your hook. Pull color B tight so the loop is secure within the stitch. Color A is now your working yarn. Be sure to knot the tails together.
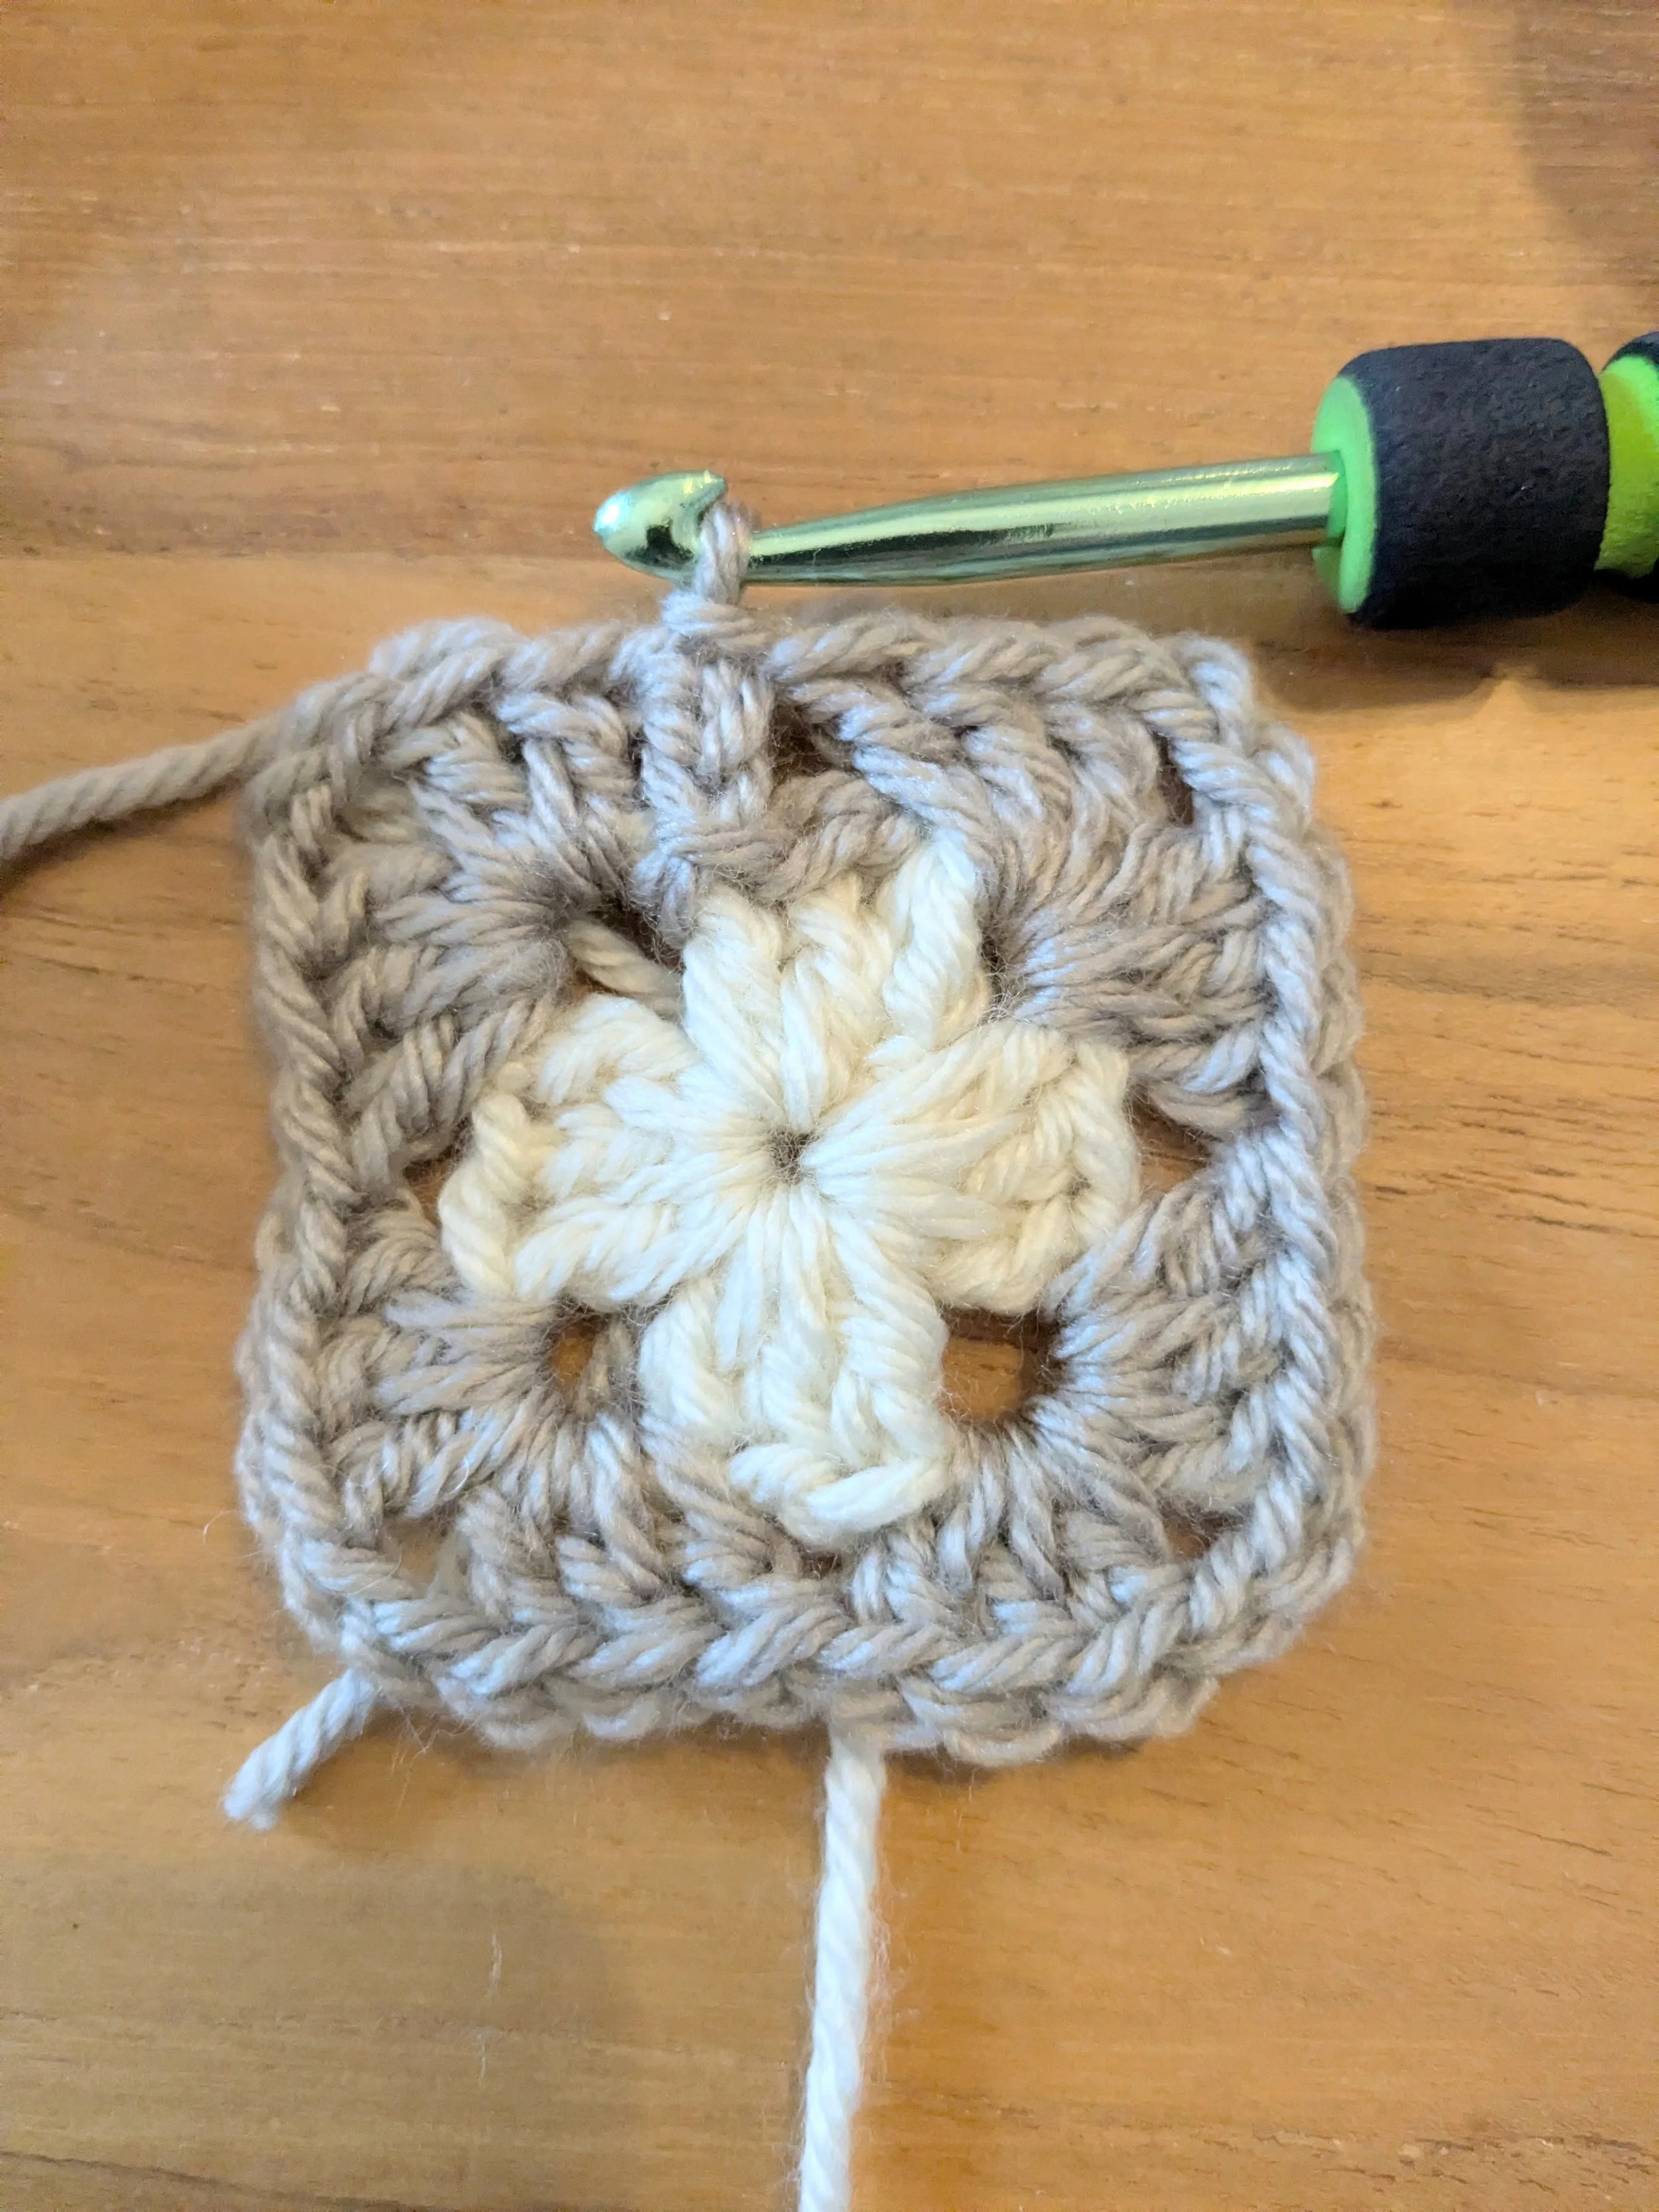
Round 3:
2 sl st to corner space.
Ch 3. 2 dc, ch 2, 3 dc in space.
3 dc in next space.
(3 dc, ch 2, 3 dc) in corner space. Repeat this sequence around, making 3 dc in each normal space and (3 dc, ch2, 3 dc) in each corner space.
End with sl st in top of ch 3 at beginning.
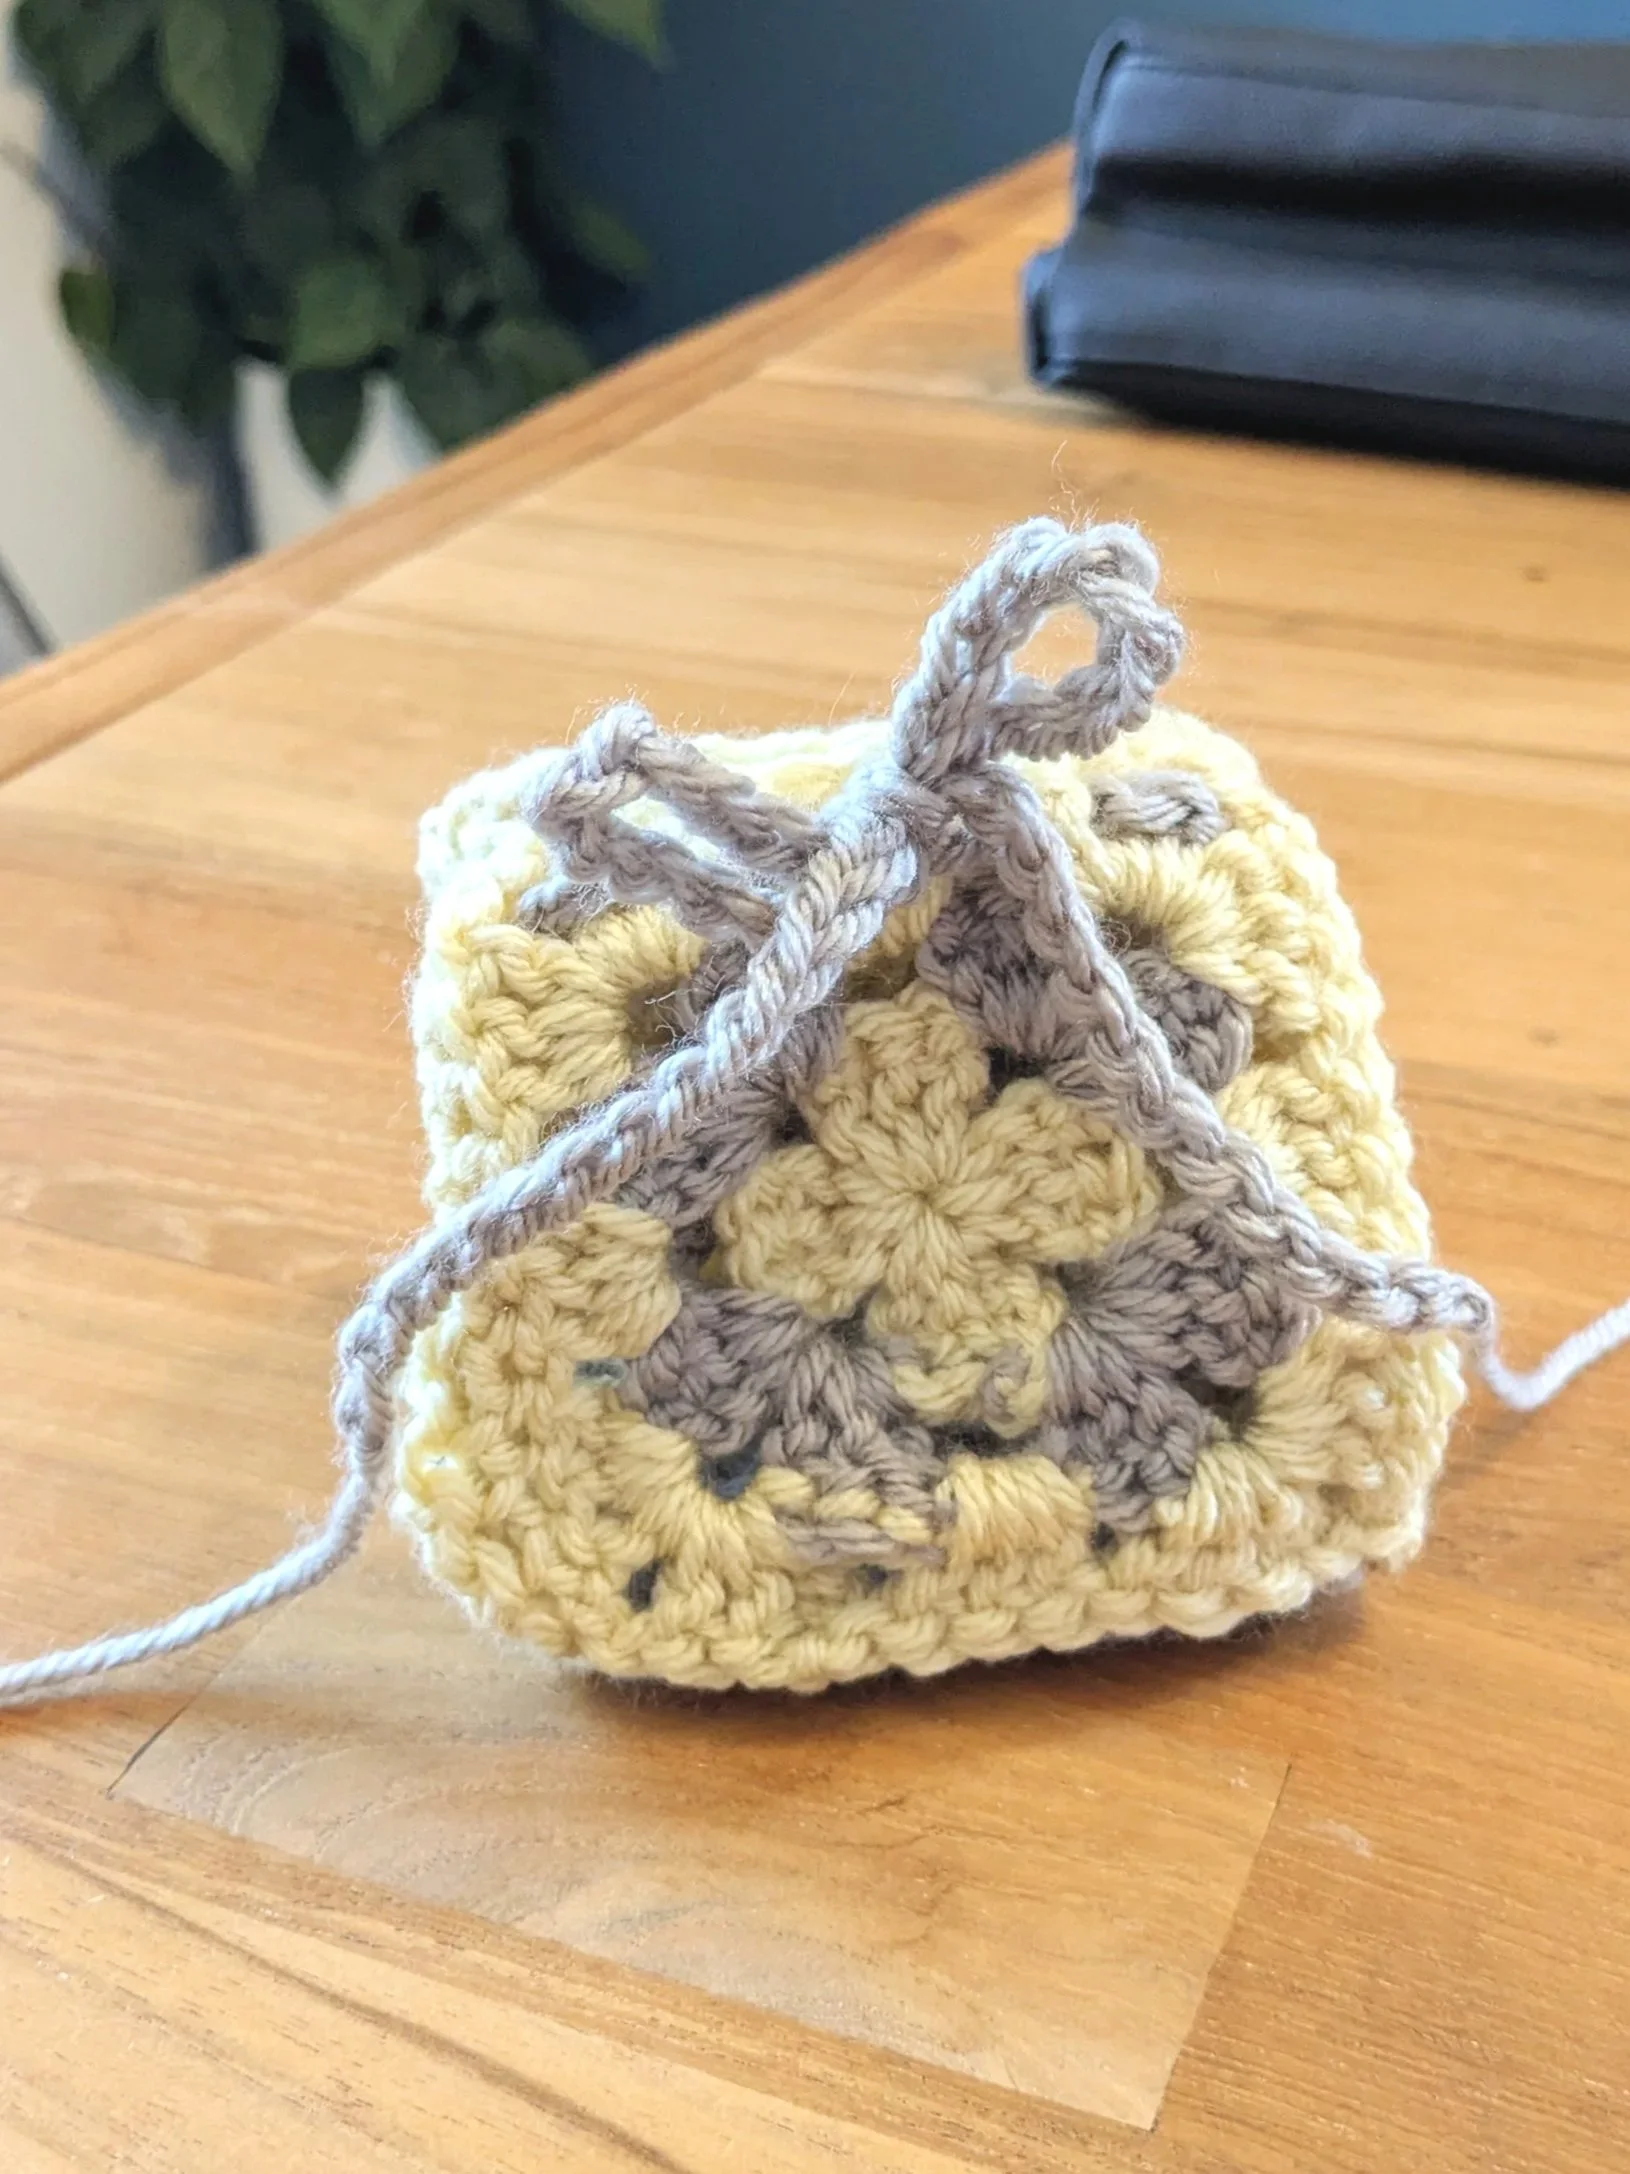
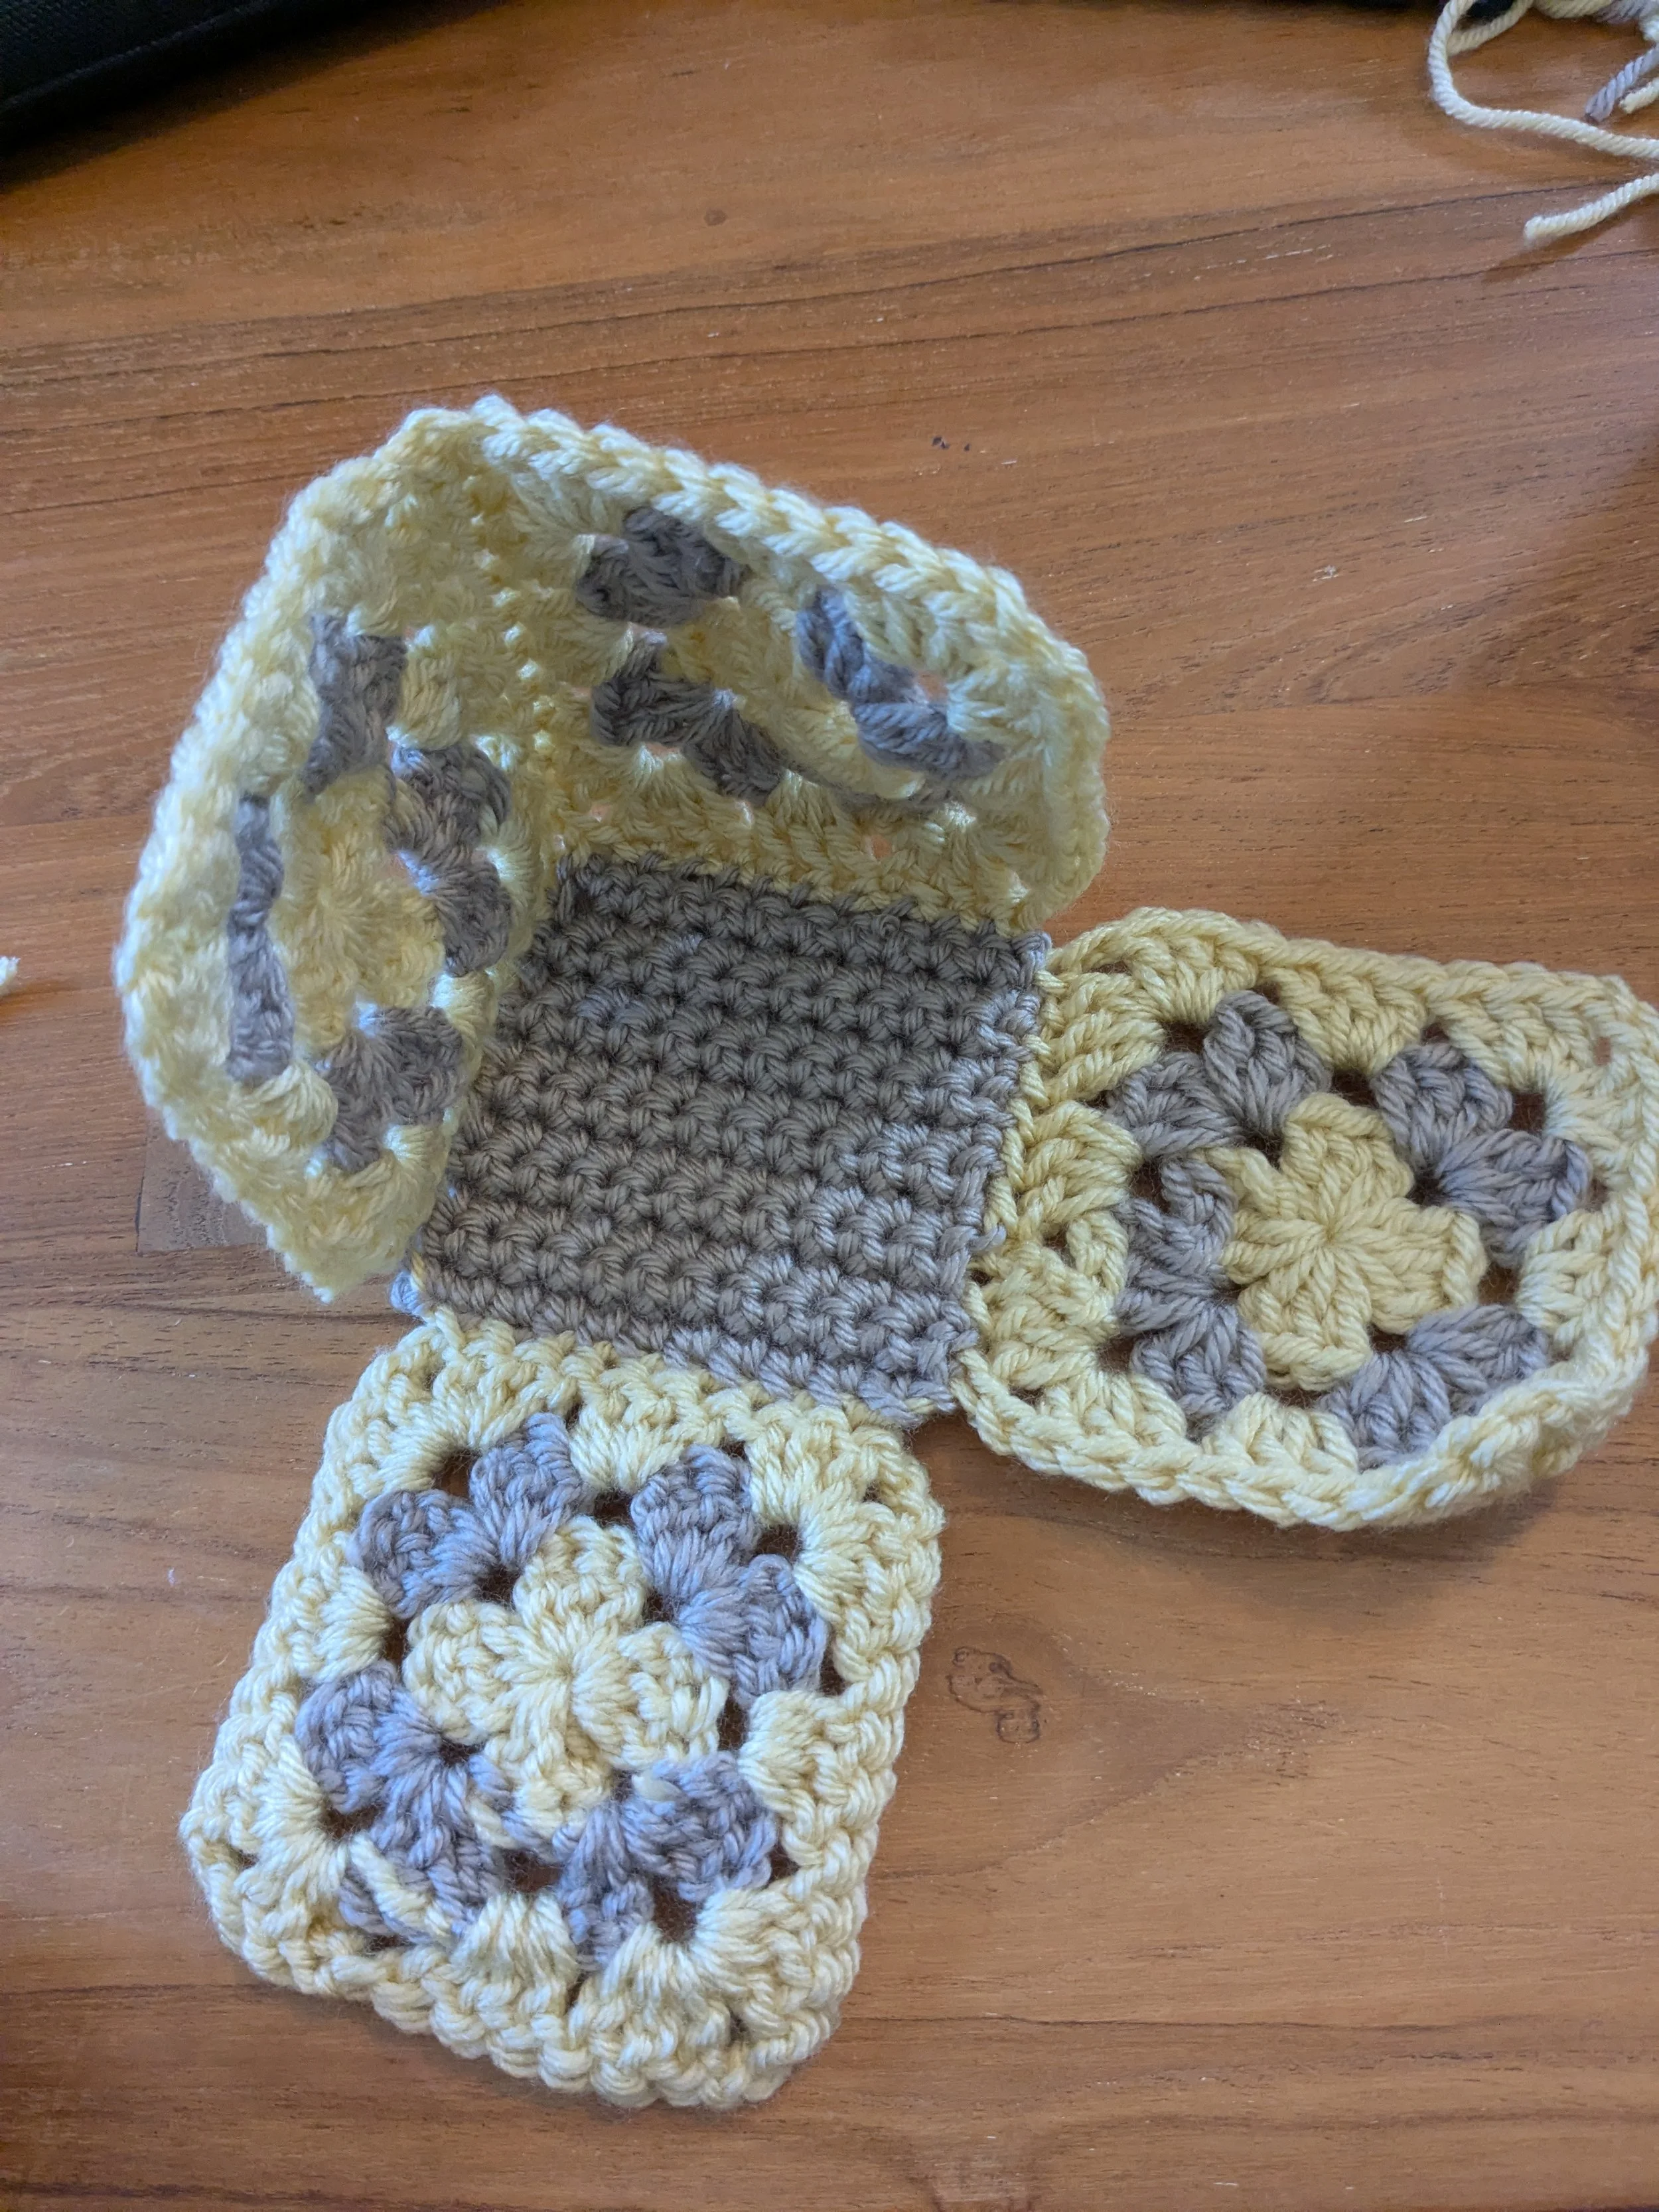
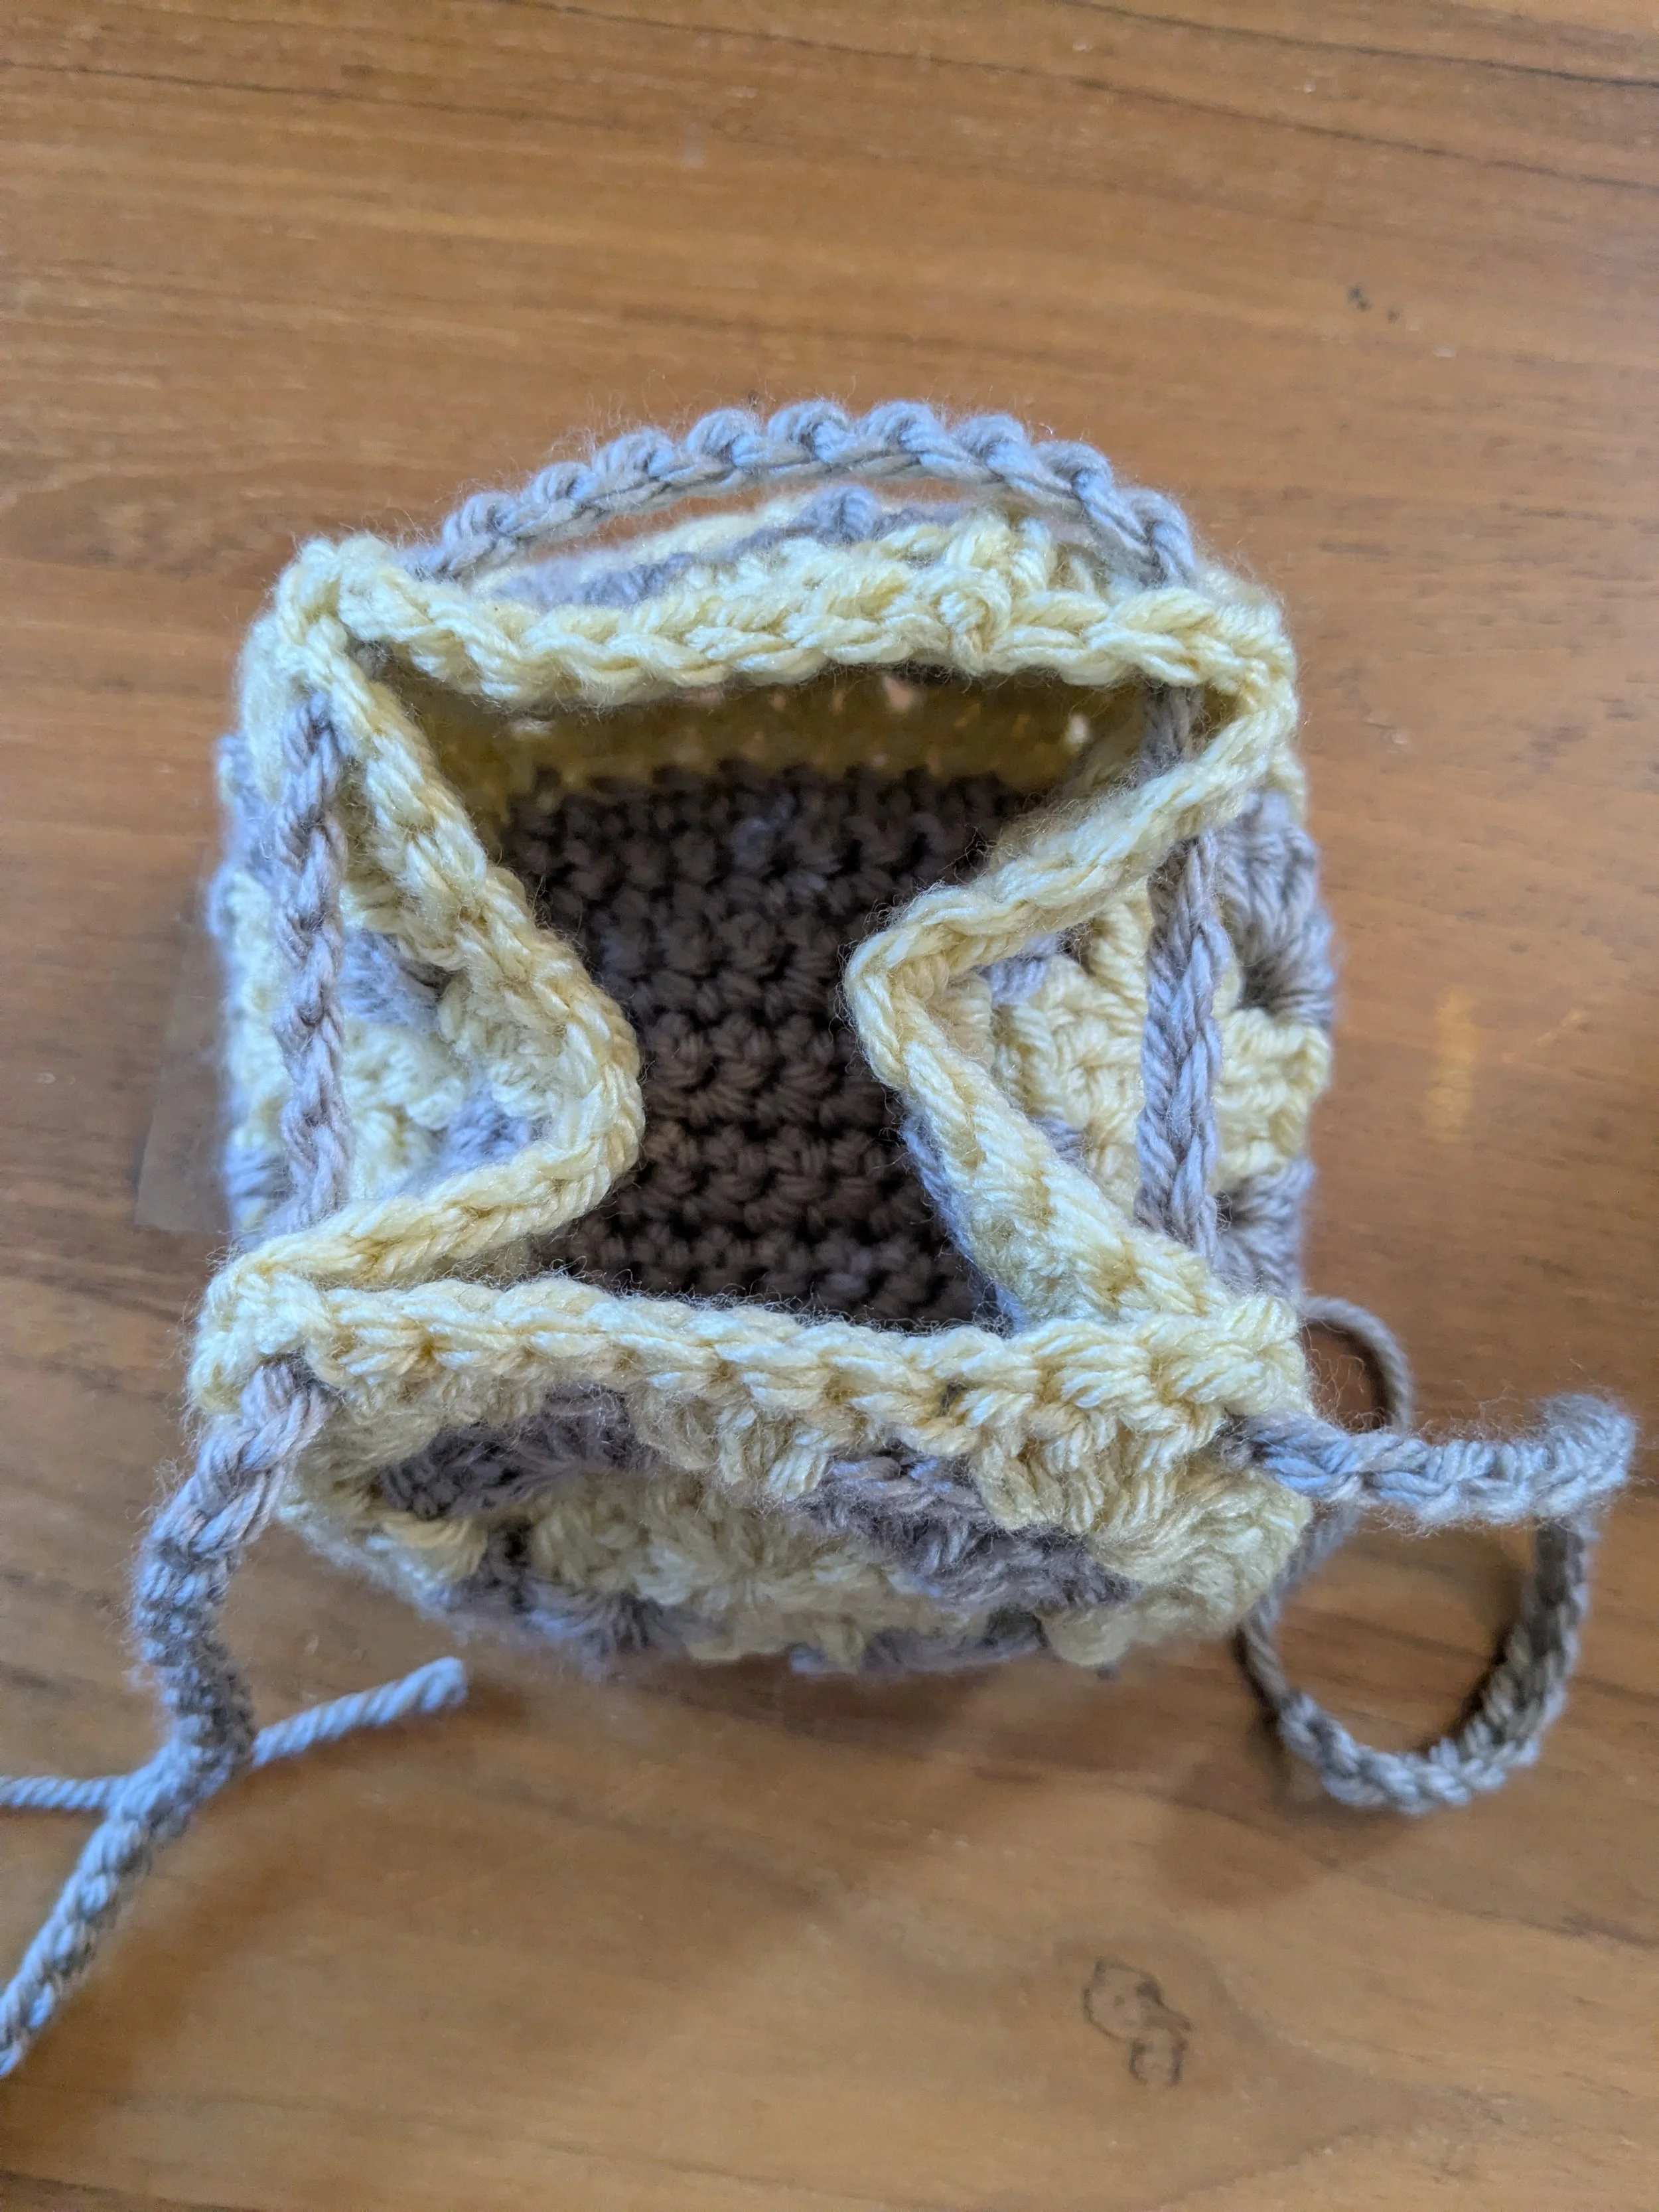
How to Assemble
Arrange your granny squares around the outside of your flat single crochet piece. Use your yarn needled to sew one side of each granny square to one side of the flat square.
Seam the sides of the granny squares together.
Weave your starting foundation chain through the corner spaces of each granny square.
© Alyssa Vukovic. Enjoy crocheting this pattern! You're welcome to sell the finished items you make from it – please just credit me as the designer (Fiber Flow Crochet). This pattern is for personal use only; please do not claim this pattern as your own and sell it.